
Setup workspaces
This page talks about steps to setup each dev container (workspace) to make it ready to code.
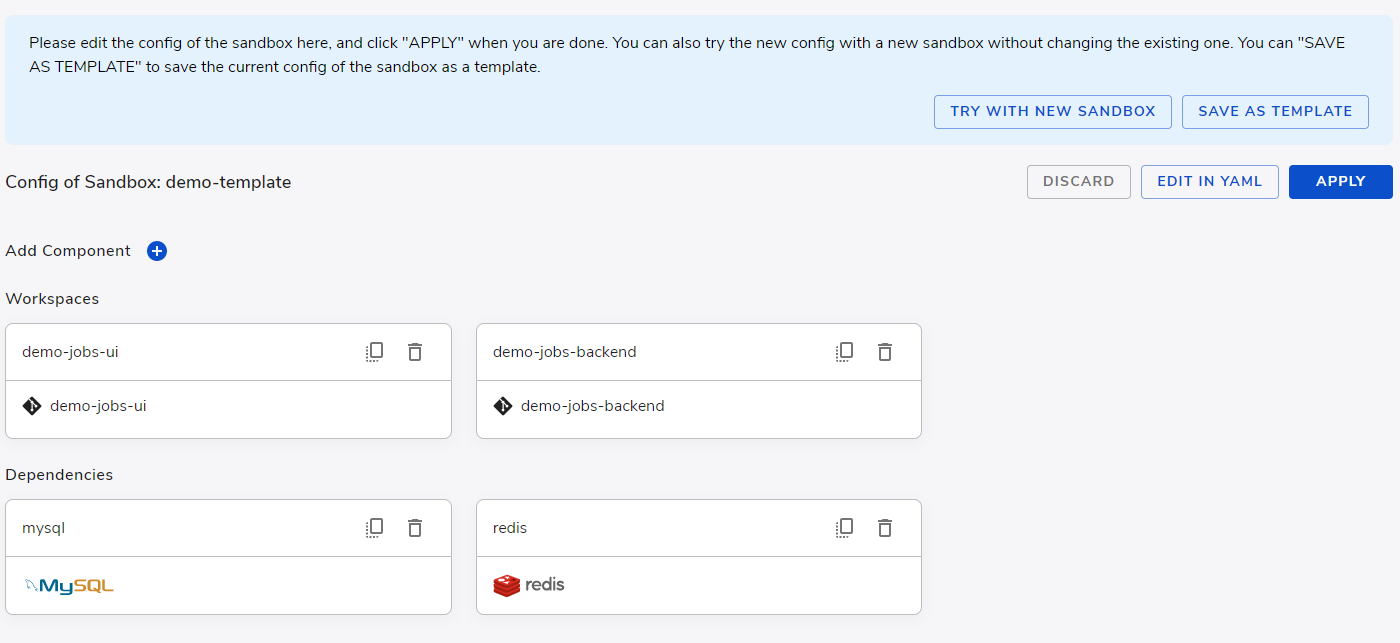
Here we assume you already have a Template Builder Sandbox, which can be basically any sandbox that is not based on a template, also called Standalone sandbox.
We recommend to open a Web IDE from for the workspace you want to setup here because some commands is best run with the code and terminal.
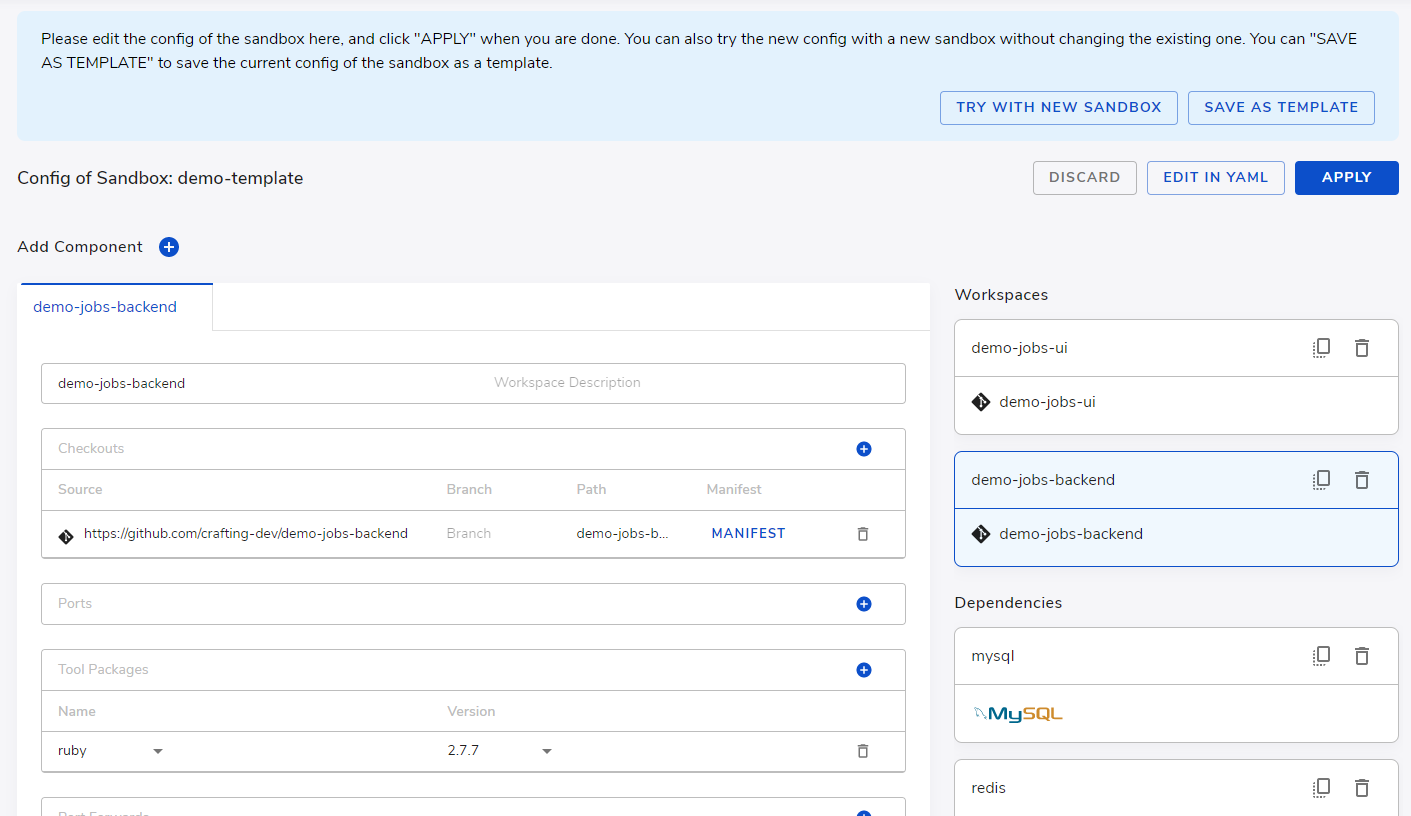
From the editing view, clicking the workspace (e.g. demo-jobs-backend) will get the workspace view for editing its details
Next, we will walk though the steps to setup one workspace. If your template includes multiple workspaces, please do the setup in each workspace following the steps.
- Add code checkouts
- Install required system packages
- Build and launch service and setup automation in repo manifest
- Setup environment variables
- Persist packages and libraries setup with snapshots
- Initialization scripts for workspace setup
- Add additional workspaces
- Test setup with new sandbox
Add code checkouts
Code checkouts are a fundamental part of the workspace. A meaningful workspace typically have one or more code checkouts. If you have selected git repos in the Template builder wizard your workspace should already have the code checked out, as shown follows.

If you didn't, or you want to add more code checkouts for the workspace, you can click the + button there to add another code checkout.
All the source repos listed in the Checkout section here will be automatically checked out to the path specified (based from the home directly).
Install required system packages
Next is to make sure we have proper dev packages to support our dev environments. We can adjust the built-in packages here as well.

In addition to the built-in packages, we can install any package needed here from the terminal in Web IDE (or ssh connection) using sudo apt install and persist it later (see Persist setup with snapshots). Essentially, here we setup the workspaces interactively, just like install software on a Linux system.
Alternatively, you can also use a custom container image you have as the base for your workspace, where you can make sure all your dev packages are in the right version. To setup, you can check the box for Custom Image in the base part from the Snapshots table, and input a container image URL, as shown below.

There are some additional notes for using a custom image as base image for workspace:
- The
base snapshotfunctionality (which is used to persist your system libraries) is replaced by the container image, therefore you can not create base snapshot anymore for this workspace. - Some tool packages may not work if the container image contains incompatible system libraries.
- The container image must be built with a few required packages installed.
Build and launch service and setup automation in repo manifest
Once we have necessary system packages installed, we want to make sure our code builds and runs in the workspace. Depending on the language and frameworks of your code, and the build tools you use, it could be bazel build, gradlew, go build, bundle, yarn, and so on. This process typically also involves downloading many libraries that your code depends on to your home directory, which we can persist it later (see Persist setup with snapshots)
If your service depends on a database, you may need to do database migrations and seeding first. You may need to adjust config files in your code to make sure it finds the database you have selected as dependency, which is running as a separate container. All dependencies have the hostnames as the dependencies' name. For more information regarding network within the sandbox, please see Network configuration and endpoints
Once the code is built and ready run, you can start the service just like you do in your local machine, using commands such as java, rails server, npm run, etc.
Once we make sure the service can run properly, we can edit the Repo Manifest to persist it in the template.

The Repo Manifest defines how Crafting system automates the setup for a git repository in the workspace after checking out the code, so that it will automatically run the setup steps we did above. An example repo manifest is as follows.
env: # Environment variables shared by all hooks, daemons and jobs.
- DB_ROOT_PASSWORD=mysql
- RAILS_ENV=development

hooks:
  post-checkout:
    cmd: |
      bundle exec rake db:migrate
  build:
    cmd: |
      bundle install

daemons:
  rails: # Name of the process is "rails", which is to launch a rails server on port 3001.
    run:
      cmd: bundle exec rails s -p 3001 -b 0.0.0.0
In the Repo Manifest, it defines what to run after every time a new version of code is checked out, how to build, and how to launch the service as a daemon process. See Repo Manifest for details.
To quickly iterate and test, you can edit the repo manifest here in the template editor directly. After it's set properly, we recommend you to commit it along with your code under .sandbox/manifest.yaml
Setup environment variables
A development environment often needs to set up environment variables (ENV) for the services to behave accordingly. Many settings are often stored in ENV and the service is commonly needing ENV to point to config files and other services. Here in the template, we can automate the set up for default environment variables.
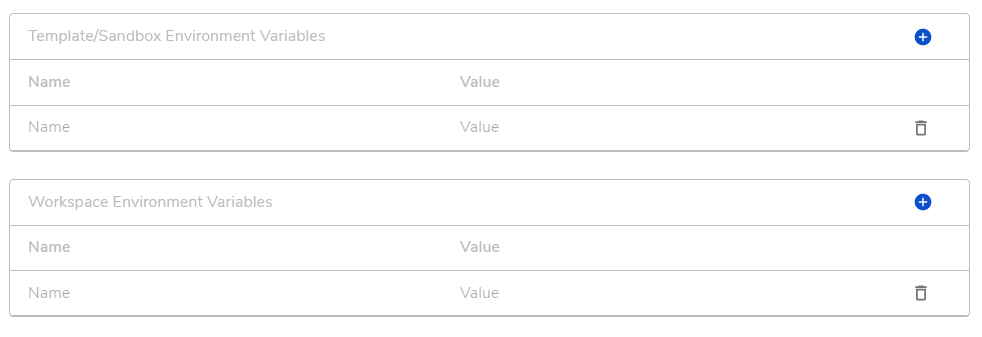
As shown above, you can set environment variables here on two levels, sandbox-level or workspace-level. The sandbox-level ENVs will be applied to all workspaces in the sandbox, while the workspace-level ENVs will only be applied to this particular workspace.
Just like we described in Environment variables (ENV):
- There are built-in environment variables defined by Crafting
- The new ENV definitions can expand from the existing definitions, and you can re-define the ENV to overwrite it.
- There is a particular merge order for ENVs: built-in, then sandbox-level, then workspace level.
At sandbox creation time, the user can extend the default definitions of ENVs in the template, but it's still a good practice to define a good set of default ENVs in the template to achieve a one-click experience for users.
Persist packages and libraries setup with snapshots
To persist the setup of workspace's file system, including the installed system packages or libraries fetched during build, Crafting features a Snapshot System to save file modifications for reuse later.
Two types of snapshots are used to save files for quickly set up a sandbox later from the template.

The Base Snapshot captures the root filesystem changes except /home/.... We can create a base snapshot using CLI running in the target workspace,
$ cs snapshot create NAMEIf a workspace doesn't currently have a base or home snapshot, the newly created base or home snapshot will be applied to the Template Builder Sandbox as default snapshot automatically.
Home snapshots
The Home Snapshot is used to persist files under the home directory, typically including the cache for libraries and packages installed on user level (not system level). Usually, we may consider to capture the following in a home snapshot:
- Configurations (
~/.config). - Cache (
~/.cache, to speed up building code). - Environment (
~/.bashrc,~/.bash_logout,~/.profileetc). - Locally installed software (
~/.local, and other folders based on the software). - VS Code extensions (
~/.vscode-remote/extensions,~/.vscode-server/extensions).
And the following should NOT be included in a Home Snapshot, as they may contain user-specific information or sensitive information:
- Source code (as it varies every time when it's checked out and doesn't make sense to put into a home directory).
- Credentials, private keys (e.g.
~/.ssh, and some config folders under~/.config).
To create a home snapshot, we need to first create includes.txt (and optionally excludes.txt files) in the workspace:
~/.snapshot/includes.txt: list of patterns of folders/files to be included, handled by-Toption oftarcommand.~/.snapshot/excludes.txt: list of patterns of folders/files to be excluded, handled by-Xoption oftarcommand.
The final list of files is collected from ~/.snapshot/includes.txt and subtracted from those matching ~/.snapshot/excludes.txt.
An example of a commonly used inclusion list is:
.bashrc
.bash_logout
.profile
.config
.local
.cache
.vscode-server/extensions
.vscode-remote/extensions
.vscode-remote/data/User/extensions.json
Use relative paths onlyThe path/patterns in the
~/.snapshot/includes.txtand~/.snapshot/excludes.txtmust be the relative paths from the home directory (/home/owner). Special folders like.or..are not allowed. Especially in the~/.snapshot/includes.txtfile, all paths must exist, otherwise the snapshot process may fail.Some common mistakes will be entries like:
~/.config,~/.vscode-server/extensionetc./.local,../some-folderetc
The extensions.json fileOld VSCode version doesn't use
data/User/extensions.jsonand load extensions directly from theextensionsfolder. The more recent versions requiredata/User/extensions.jsonin addition to theextensionsfolder. If your local VSCode doesn't load any extensions from a workspace with a home snapshot already containing extensions, please add the following to the inclusion list before creating the home snapshot:.vscode-server/data/User/extensions.json
Mostly, ~/.snapshot/excludes.txt is not needed unless in the following cases:
- Some sub-directories (and/or files) of an included directory must be excluded.
- The inclusion pattern is complicated or difficult to write.
Then add the top-level directory in ~/.snapshot/includes.txt, and add subfolders, specific files, etc. to be excluded in ~/.snapshot/excludes.txt. For instance, a tool stores credentials in ~/.config/SomeTool/credentials, which must be excluded. As in the above example, .config is already in the inclusion list; therefore using ~/.snapshot/excludes.txt will be simpler to express the exclusion rule:
.config/SomeTool/credentialsAfter the configuration files are ready, take a home snapshot by running CLI from the terminal in the workspace:
$ cs snapshot create --home NAMENote that the Home Snapshot represents a team default setup of the home directory in the workspace, which can be extended by each developer by their Personal Snapshot, following a similar pattern for creation. (see Personalize your sandbox)
Trade-offs between home snapshot and automation scripts
The home snapshot is a great way to speed up launches of new sandboxes from templates. Sometimes to properly setup a workspace, a large number of packages need to be downloaded from Internet and installed using the automation hooks in repo manifest or workspace level setup scripts (described below). Especially with large codebase for a sophisticated product, the setup time can be very long. With snapshots, the setup time can often by greatly shortened, sometimes trimming down 90% of the setup time.
On the other hand, it's often impractical to update the snapshot every time something changes. So it's common practice to still run the full setup script which will take advantage of the cache if the cache is present.
Like any caching system, snapshot does require some maintenance. If things are changed too much, the cache becomes less useful and you will need to retake the snapshot to include new packages. And as snapshot grows, it could act unexpectedly if content becomes stale. For example, the snapshot may still contain the old version of the library while the setup script tries to install a new version of library, causing confusions.
So our recommendation is that:
- If the setup script can finish very quickly, just rely on the script to setup the environment.
- If the setup script runs for a long time, do use home snapshots but periodically (e.g., quarterly) refresh it.
- After major code cleanup or restructure, refresh the snapshot from a clean state to clear the unused content.
The same trade-off also applies to the case between data snapshot and seeding scripts.
Initialization scripts for workspace setup
Sometimes, in addition to restoring file changes from snapshots, we want certain custom setup steps to be run at workspace creation time, for example, connect VPN. Crafting supports two types of scripts in a workspace, which will run when it starts or resumes form suspension.
/etc/sandbox.d/setup: when it's present with exec permission, it runs as root after all home snapshots (shared home snapshot and personal home snapshot) are applied;~/.sandbox/setup: when it's present with exec permission, it runs after/etc/sandbox.d/setup, under the identity of the workspace owner user.
These scripts are used for dynamic customization, mostly updates configurations based on the current sandbox information. Installing software should be done interactively and saved in a base snapshot to make the workspace launch faster.
The script /etc/sandbox.d/setup can be included in a base snapshot and used for system-level customization. And script ~/.sandbox/setup can be included in a home snapshot for customization per-user. It can further load other scripts optionally which can be included in a personal snapshot.
For example:
#!/bin/bash

# ... Do something ...

if [[ -f ~/.sandbox/personalize.sh ]]; then
  . ~/.sandbox/personalize.sh
fi
Then put this in a home snapshot and ~/.sandbox/personalize.sh in a personal snapshot:
.sandbox/setup.sandbox/personalize.sh
SSH Host Key Verification failureThe startup scripts run before any git operation performed by Crafting. If some
gitcommands are used in these scripts with SSH protocol (e.g.[email protected]:...), you will see errors like:Host key verification failed.The reason behind that is: when the script runs, there's no
~/.ssh/known_hosts, without interactively asking for confirmation, SSH will automatically reject any unknown host keys.The solution is to add
export GIT_SSH_COMMAND='ssh -o StrictHostKeyChecking=no'in the scripts before running anygitcommands.
Daemons in workspace
Background processes can be defined in a workspace to be launched after startup and kept running. There are 2 places to define daemons:
- In the Template, see Workspace System, for example:
workspaces:
- name: example
  ...
  system:
    daemons:
    - name: foo
      run:
        cmd: ./foo bar
        dir: /opt/foo
        env:
- FOO=BAR- On the filesystem
/etc/sandbox.d/daemonsand baked in the base snapshot, for example add the file/etc/sandbox.d/daemons/foo.yaml:
name: foo
run:
  cmd: ./foo bar
  dir: /opt/foo
  env:
  - FOO=BAR
Add additional workspaces
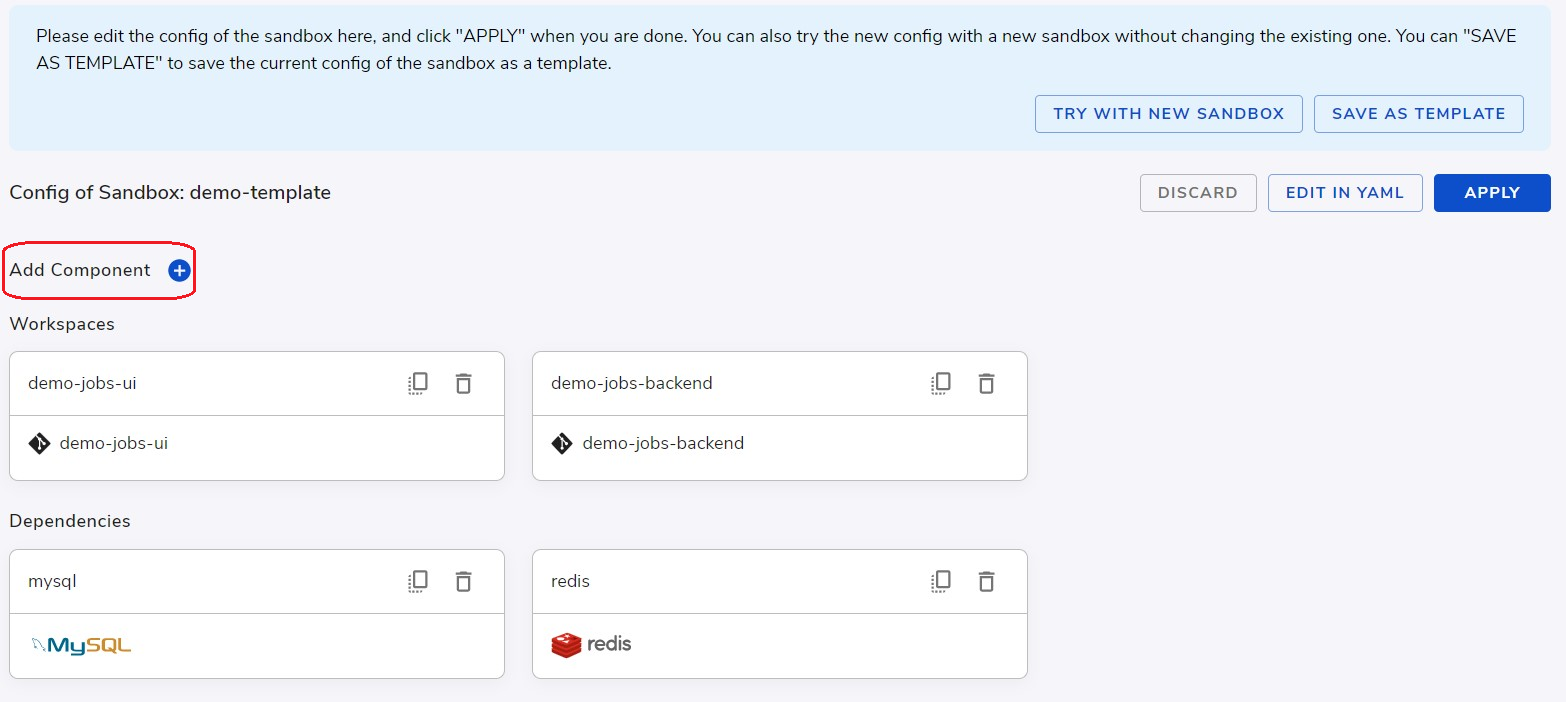
Crafting supports multiple workspaces running in a sandbox for running multiple services. To add a new workspace, simply click Add Component from the editing view, as highlighted below, and select Workspaces in the dialog.
After adding the new workspace, just repeat the steps above to set it up, until all workspaces have been added and set up. During the process you may want to add other components like dependencies or containers, please see the following pages (e.g. Setup containers and dependencies) for details.
Test setup with new sandbox
Lastly, to test the setup for the workspace and make sure it works properly, we recommend to create a new sandbox to test by clicking Try with new sandbox highlighted below.
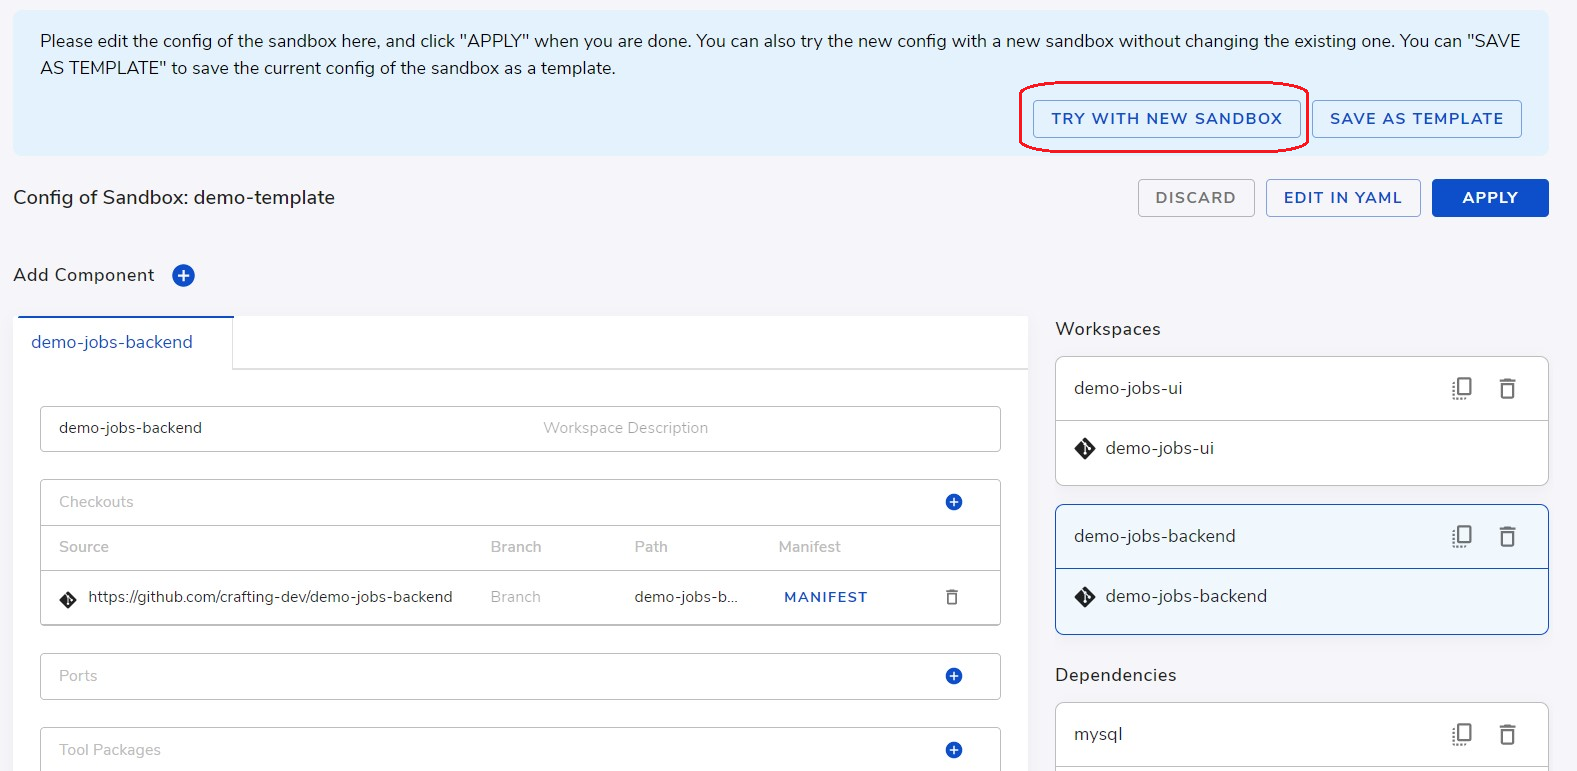
If everything is automatically setup for the workspace in the new sandbox, we are done here. If not, we can adjust some settings, retake snapshots, etc., and then test it again.
Updated 9 months ago