
Start a Workspace
In this section, we talk about how to start a simple workspace to do some online coding. If you are in a development team, it's likely that your team's admin has already set up the standard development environments into templates. In that case, you should see Launch a sandbox for more information on how you can further customize and launch sandbox.
To start a workspace, which is a dev container on cloud where you can code and run your program, you can directly click Create new Sandbox from the Home page on your web console.
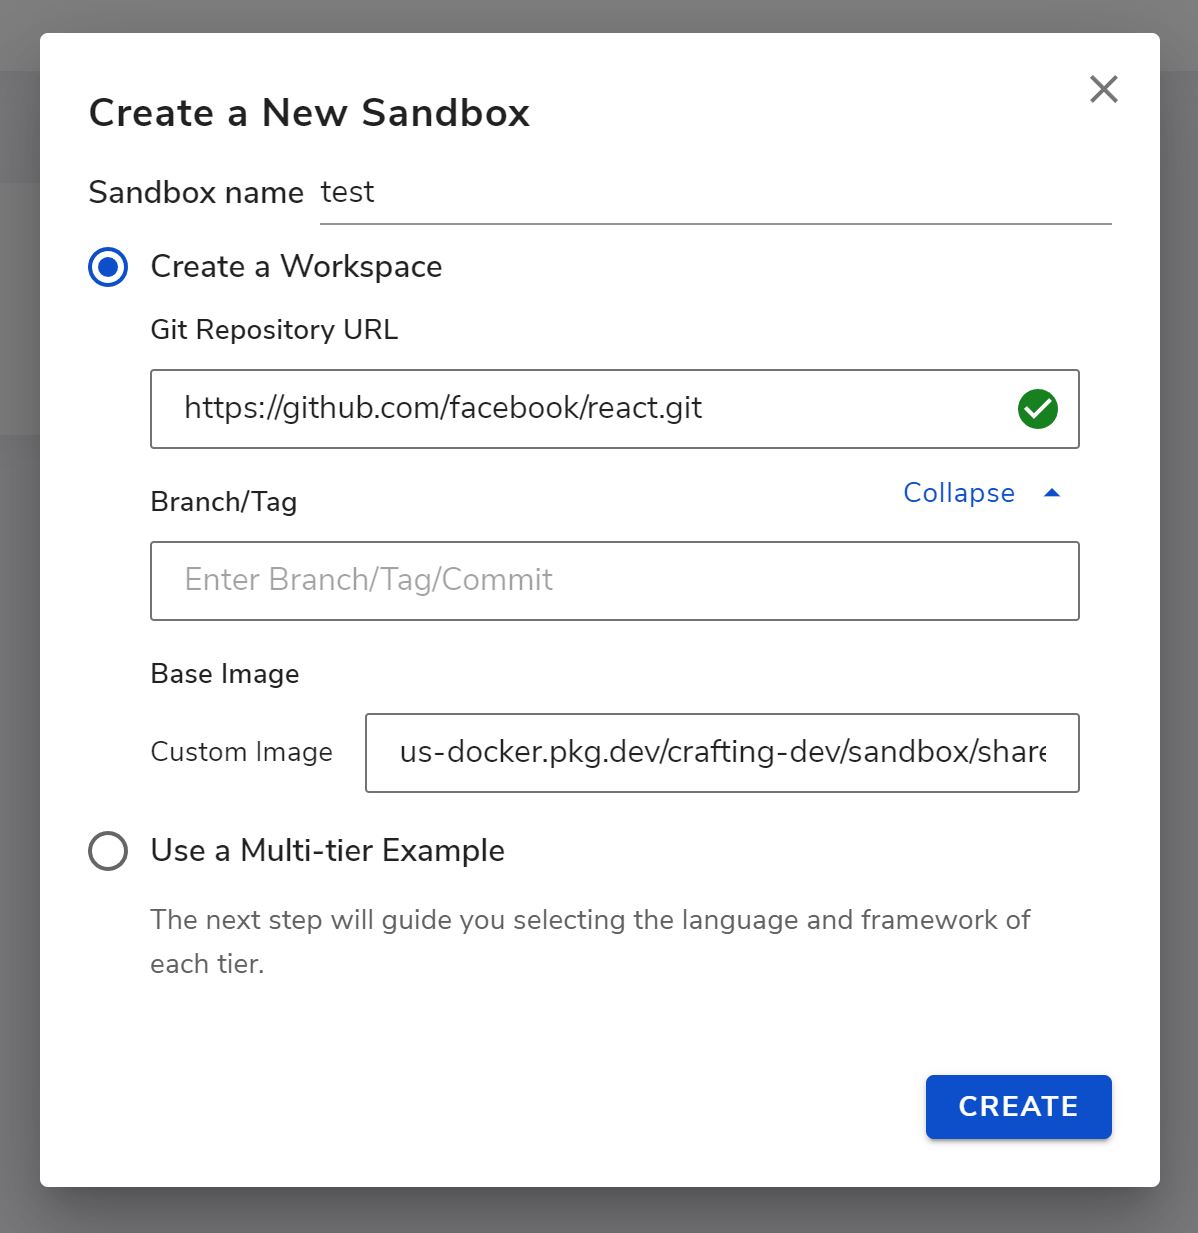
Then, under Create a Workspace, you can choose the Git repository URL you want to checkout code and the branch. Optionally you can also also choose a special container image that you want to use for your workspace. By default, it will be based on a standard Ubuntu Linux image. Clicking Create will create a new sandbox with a single workspace.
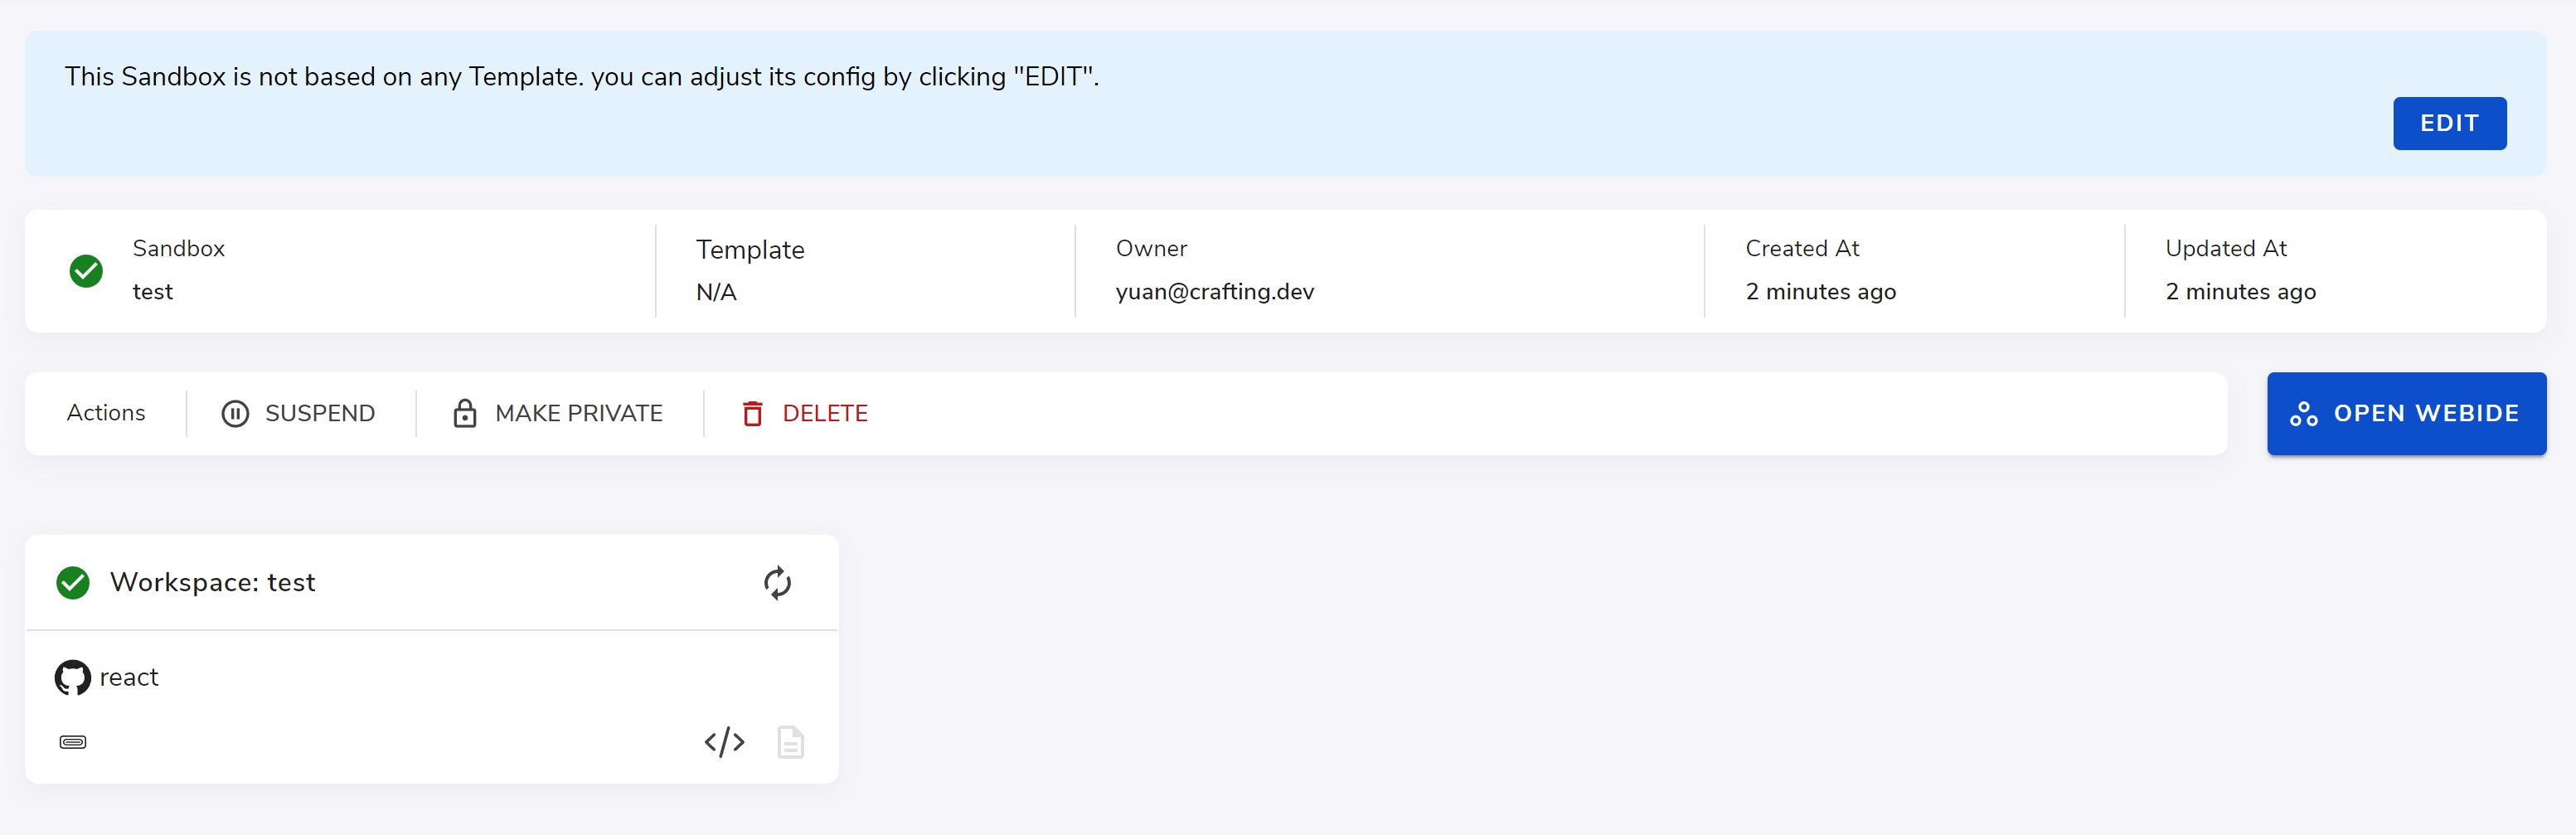
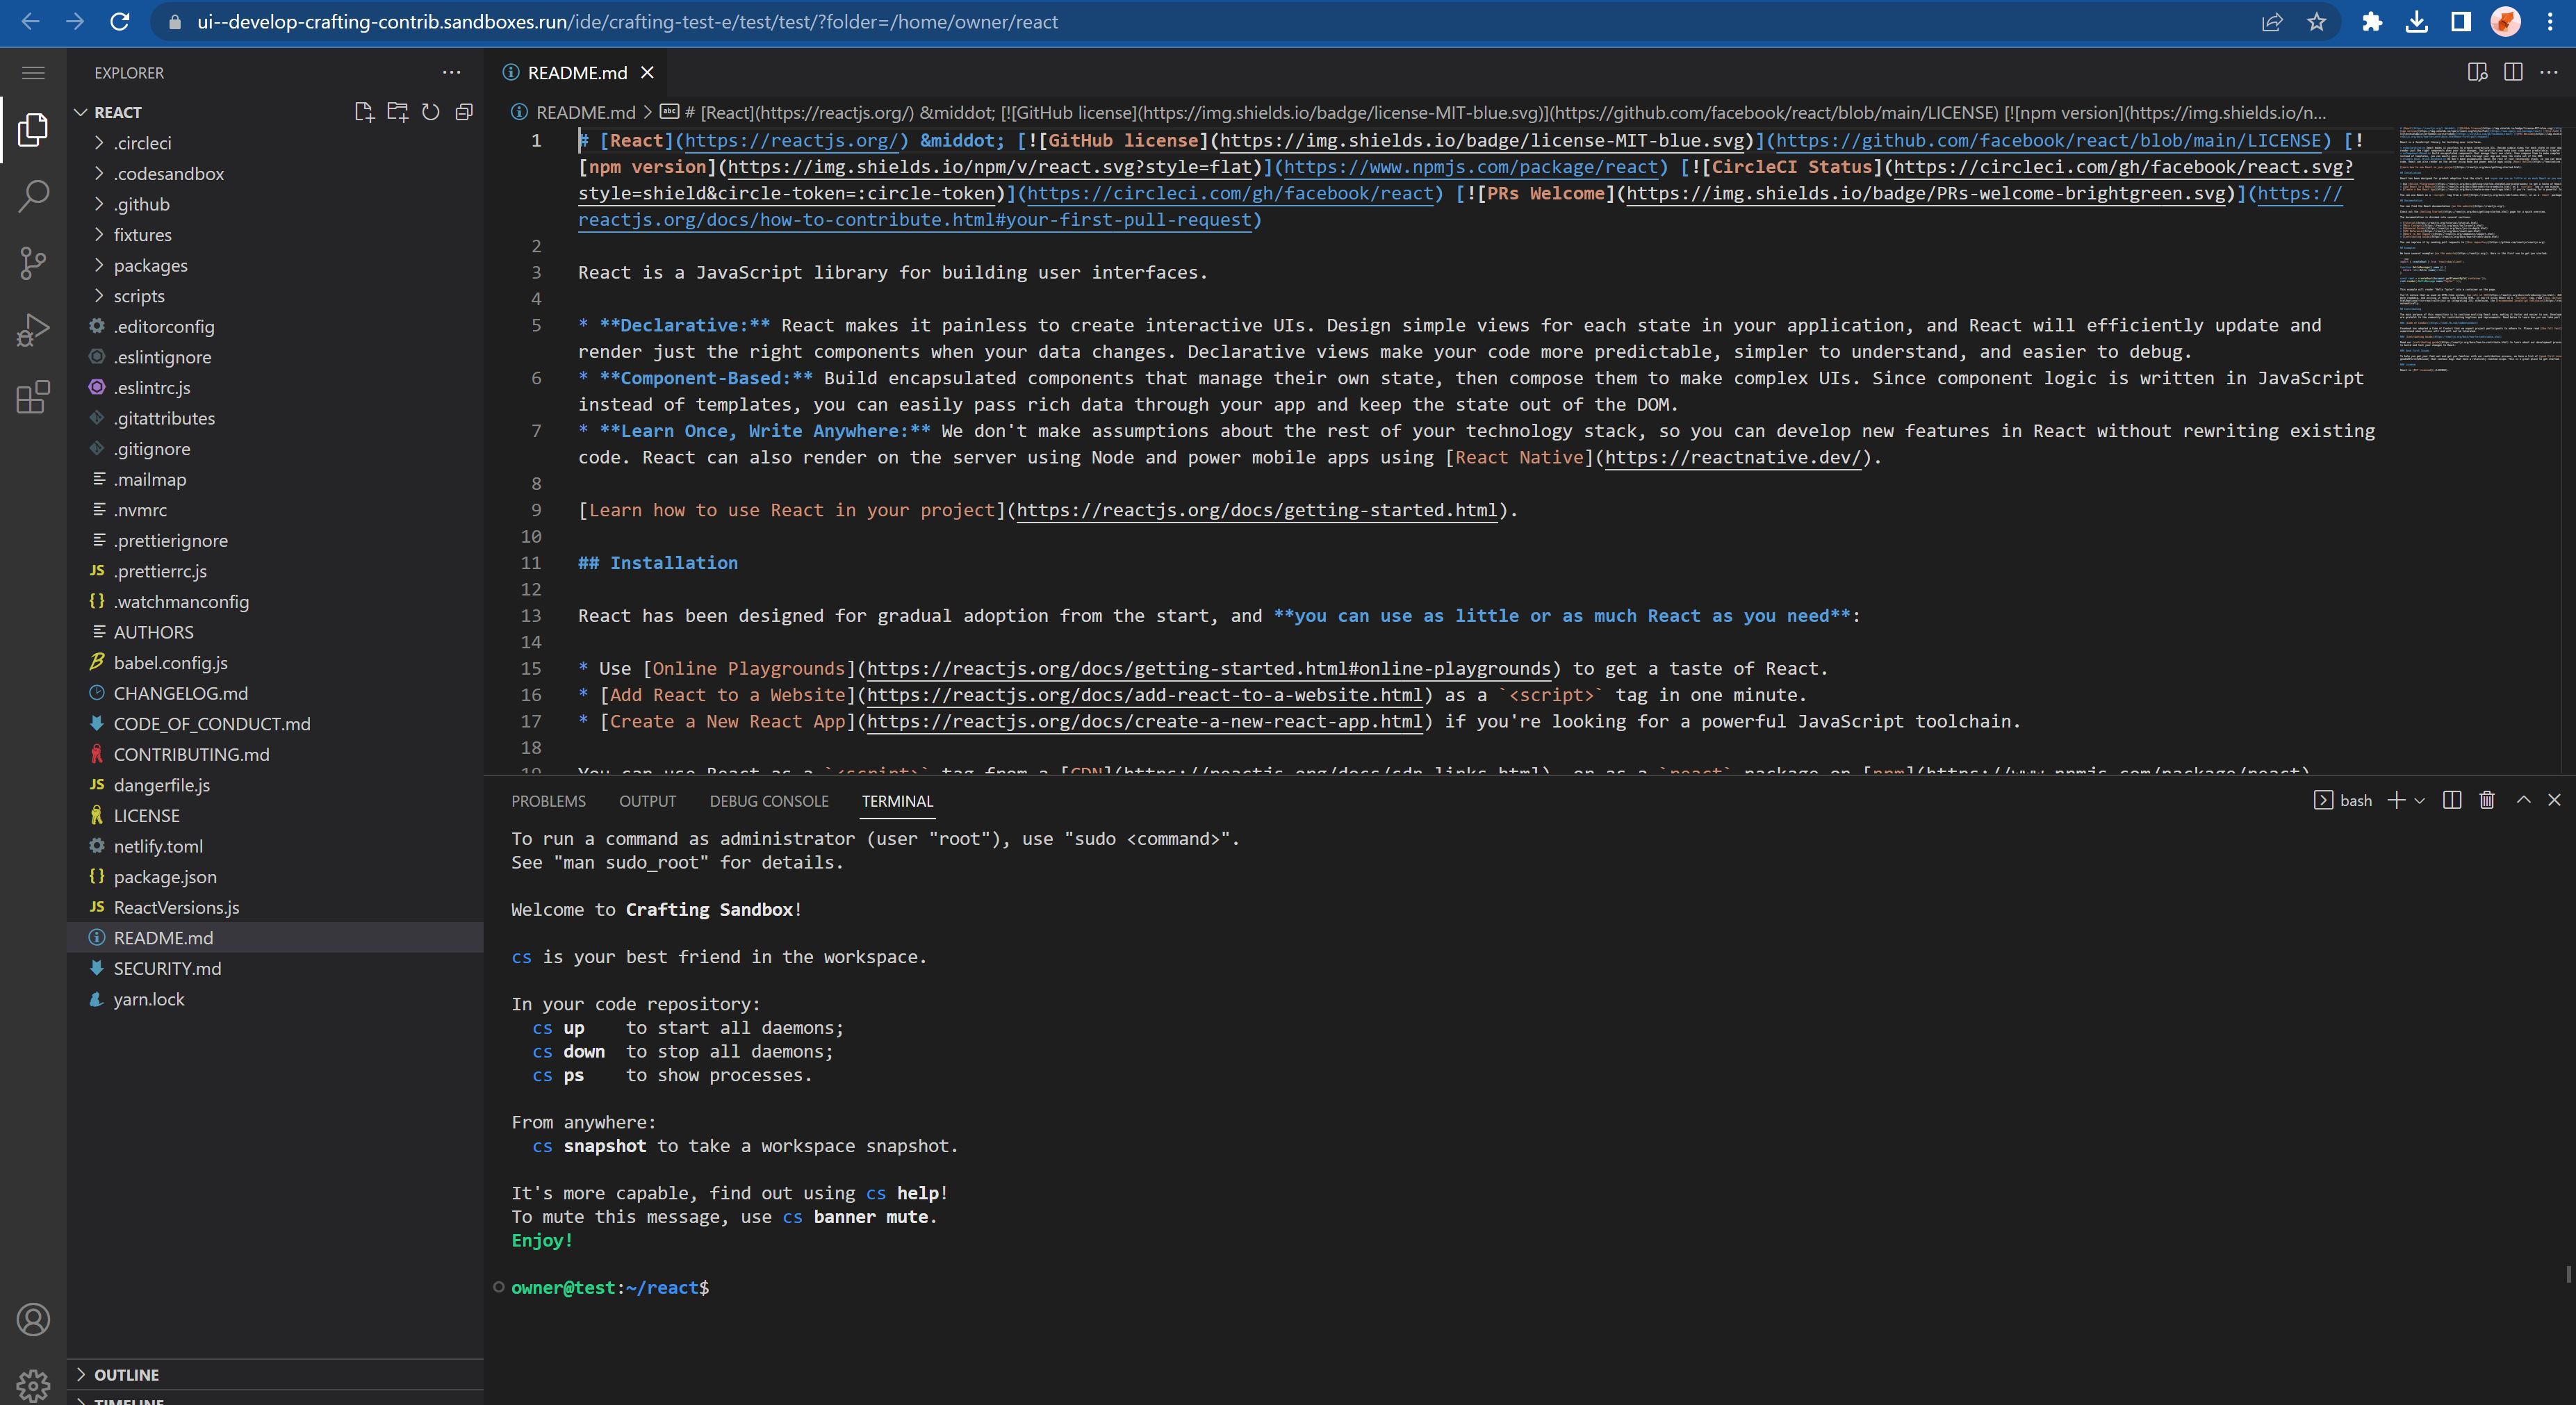
When the sandbox is ready, the source code is checked out into the sandbox and you can click Open WebIDE to get into the Web IDE session to edit code. Like shown below, the Web IDE is based on VS code and has a terminal for executing commands.
You can also quickly modify the sandbox's configuration by clicking Edit. In the editing view, you can add more components such as workspaces, containers, dependencies, etc. to your sandbox. For details on editing the config, please see here
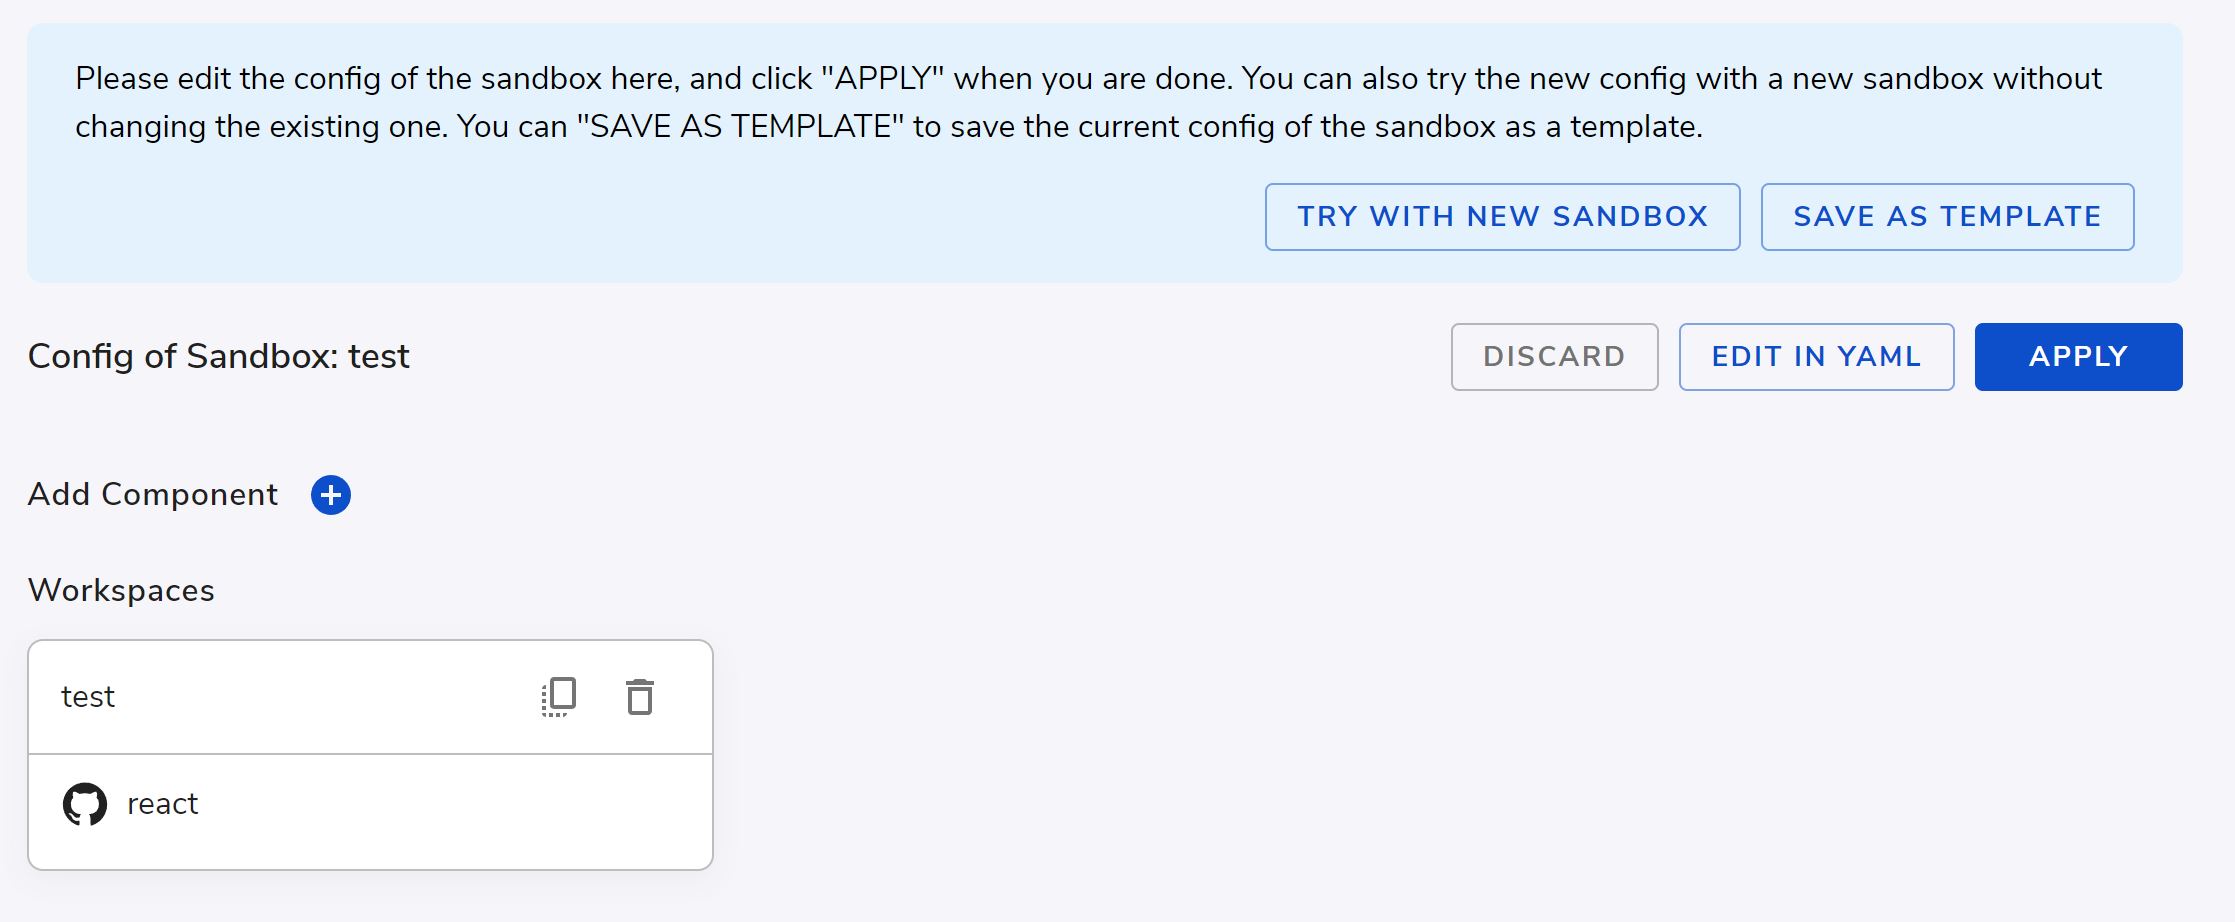
After editing, you can save the current sandbox configuration as a template so that sandbox created in future can use these templates. Or click Apply to save the config to the current sandbox. For more information, please see Standalone sandbox.
Updated 9 months ago