
Code Change (PR) Preview
In this section, we are going to illustrate the use case of previewing code changes (Pull Requests) with Crafting. The main benefits of Crafting in this use case are:
- Test any code change end-to-end with a self-contained environment before merge
- Leverage existing production config to create production like preview
- Environments are ephemeral, auto suspend and auto cleanup
- Test from mobile apps, web frontend, internet-facing API, by teammates or partners
- Debug live in the environment and fixes are applied instantly without redeploy
The rest of this section has following topics:
- Create an environment on-demand from Pull Requests
- Run your app end-to-end a self-contained environment
- View logs, debug, and iterate
- Replace a service on the cloud with a local service
- Setup checklist
Create an environment on-demand from Pull Requests
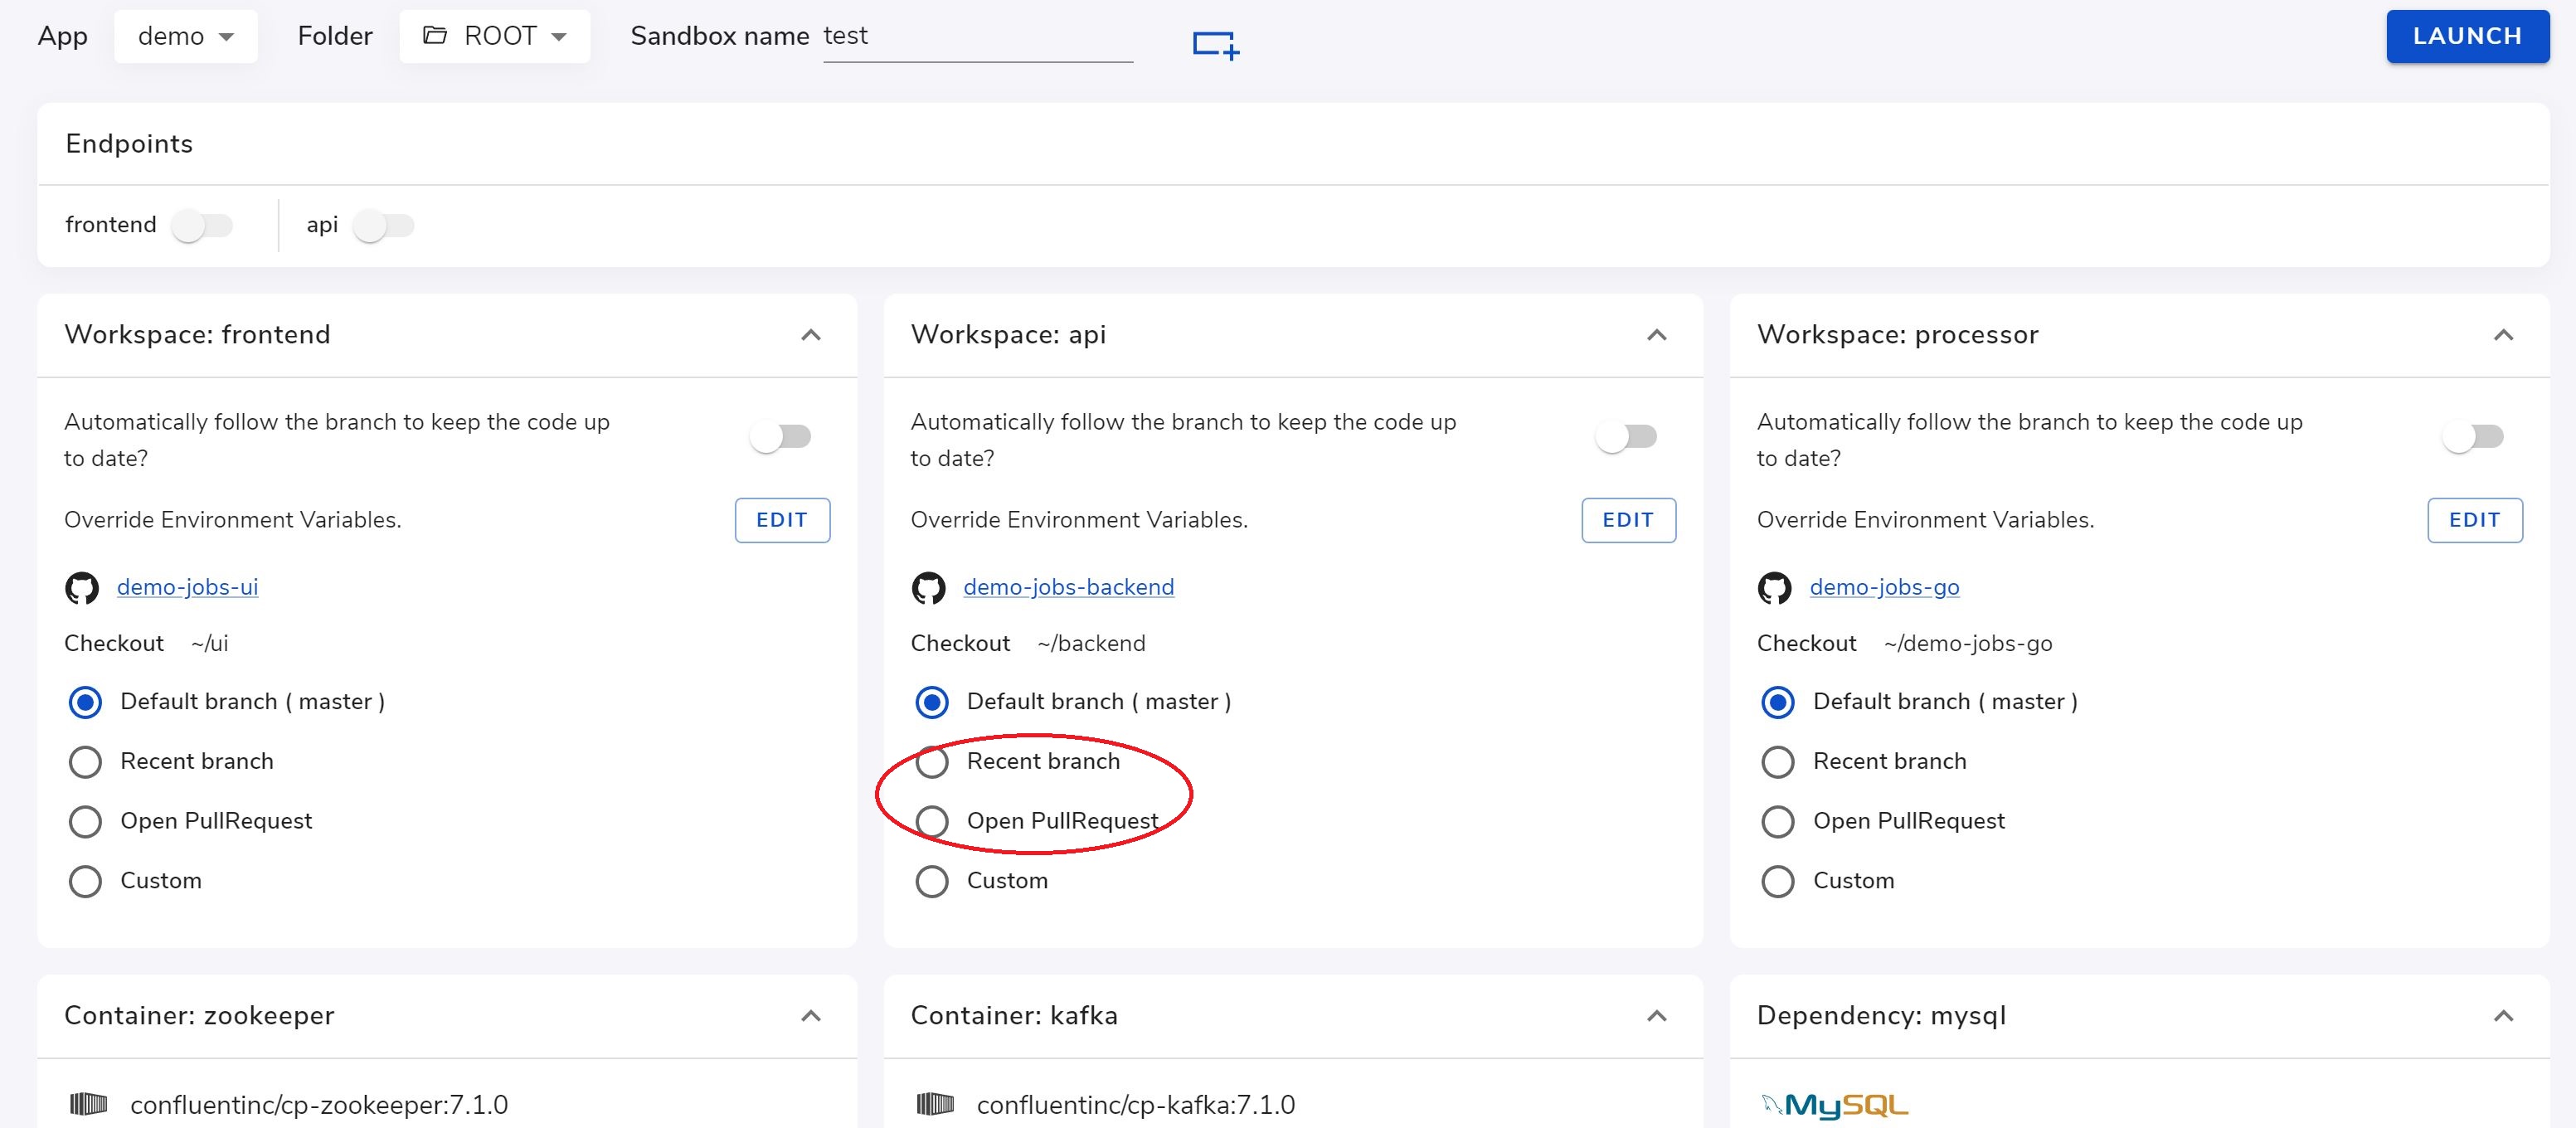
To create an environment (Sandbox) for preview, you select it from the sandbox creation page and select which code branch or open Pull Request as the version of the code for the corresponding workspace, as shown below.
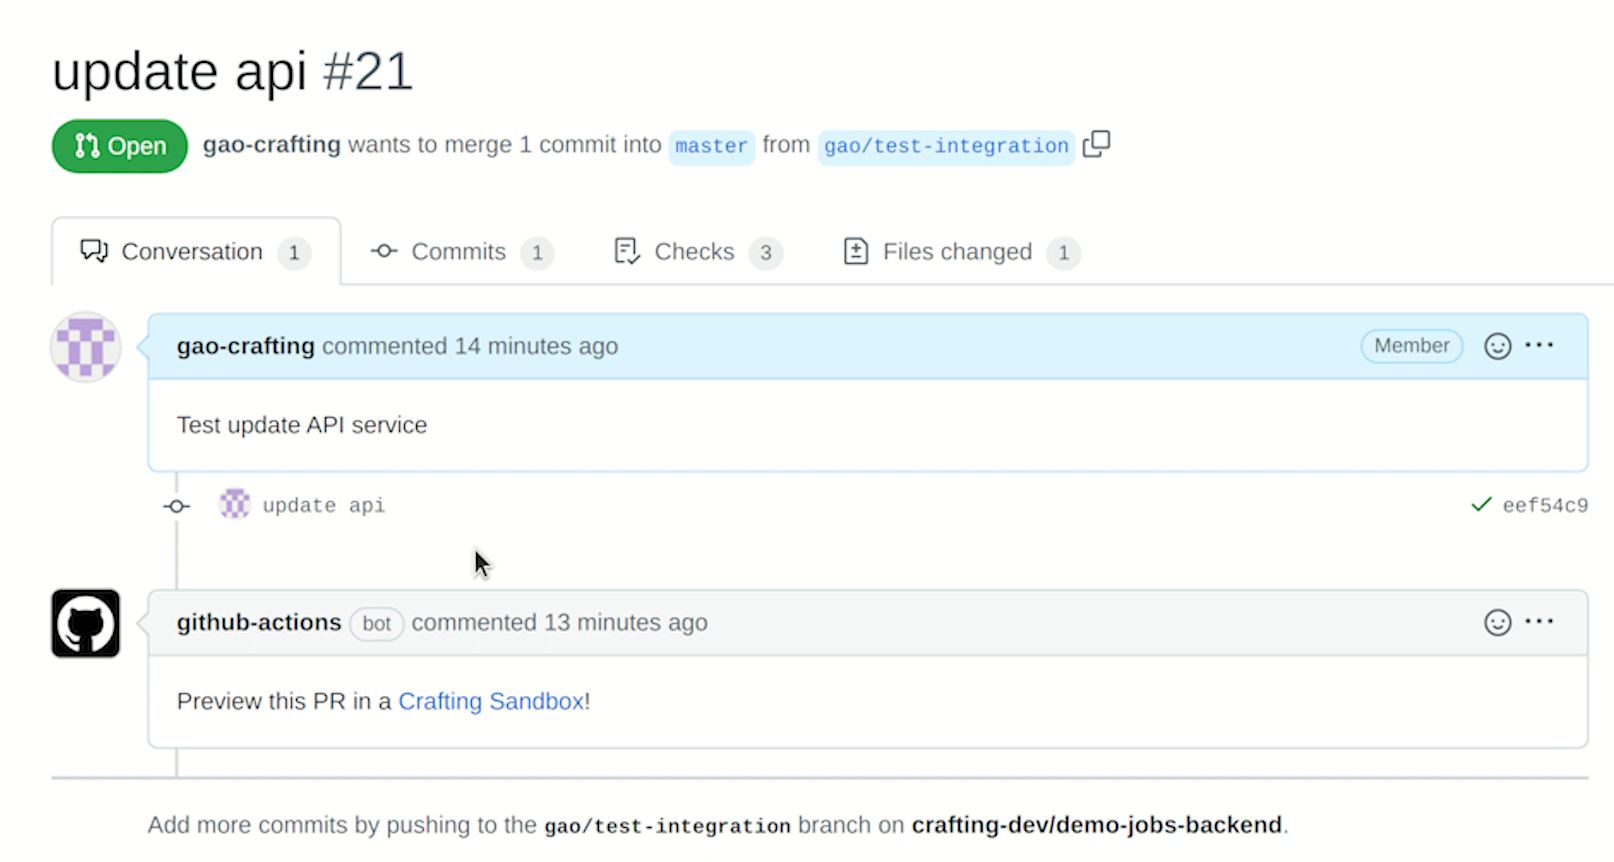
Alternatively, we recommend to use an integration with your Git provider and embed a link in the Pull Request via some automation, e.g. GitHub action, which allows a sandbox with the code branch for the PR to be created on demand when the user clicks the link. The following shows an example Github action integration.
Once a sandbox is launched, the Crafting platform would follow the template and create all components in corresponding containers, run the services, and setup Internet accessible endpoints for you to test. You would be able to see all the logs during this process and debug if there is any errors in build and run.
Run your app end-to-end a self-contained environment
After the sandbox is launched ready, you can run your app end-to-end by accessing the entry services via any endpoint, as shown in the following.
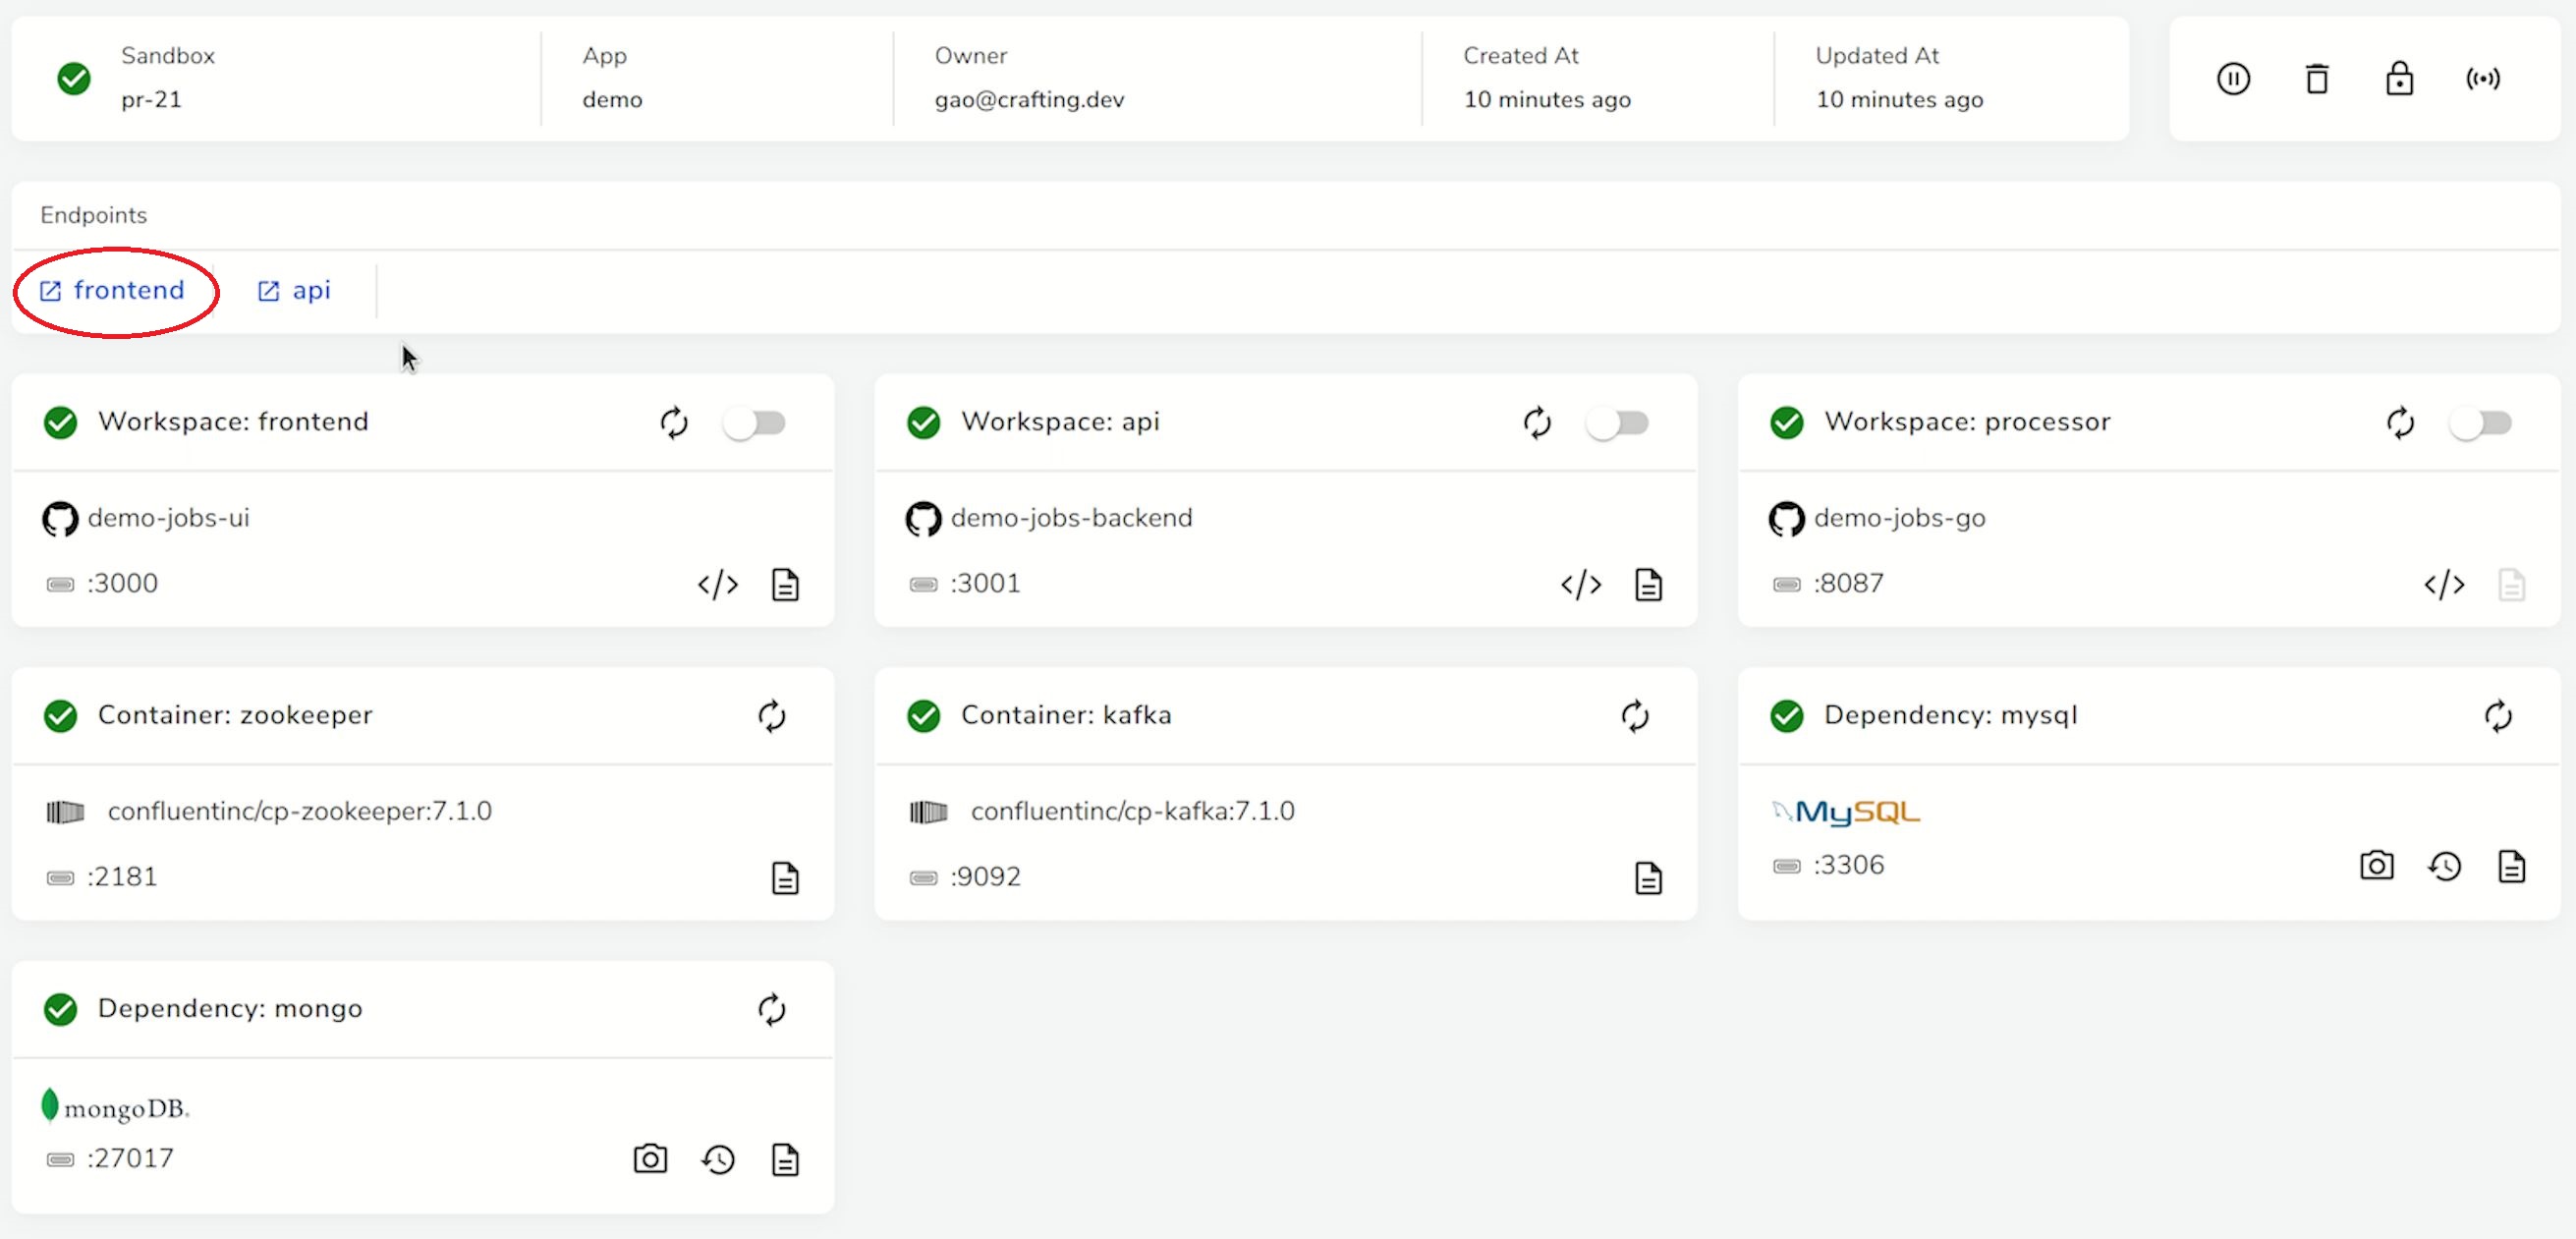
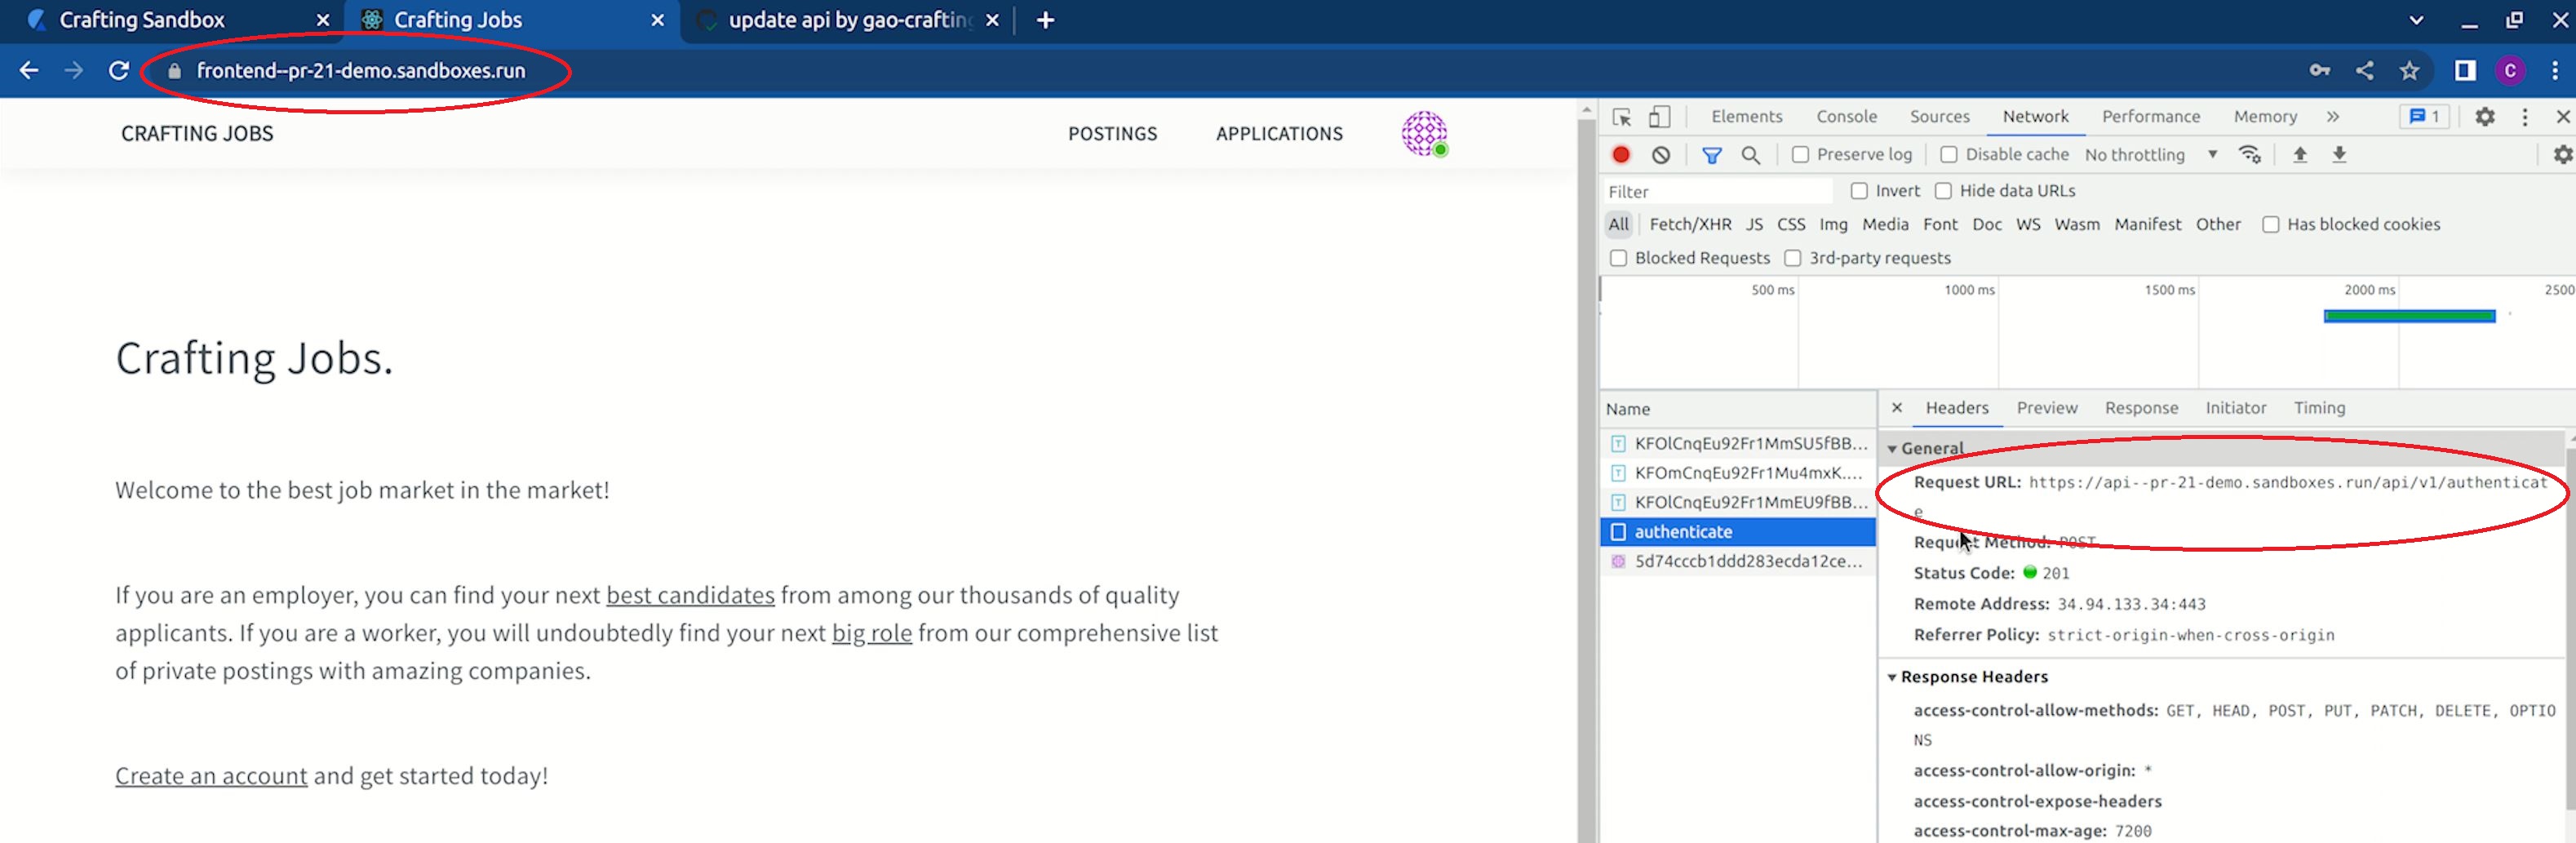
An endpoint is an URL that are routed to a port in a container in the sandbox, where your service is listening to. For example, the above frontend endpoint (https://frontend--pr21-demo.sandboxes.run) is pointing to the frontend workspace's port 3000, where the frontend server is listening to, and the api endpoint is pointing to the api workspace's port 3001, where the backend server is listening to.
When opening that frontend endpoint in browser, the request hits the service running in the sandbox and loads the page, and with proper setup, the API calls made from the frontend also hit the service running in the same sandbox via the api endpoint, as shown below. This way, you can do an end-to-end preview with a full self-contained environment for your app.
For using mobile apps to drive end-to-end preview, you can have your mobile app client side point to an endpoint from the sandbox, just like pointing to the URL of your production API. The endpoint name is generated predictably from your sandbox name and endpoint name, which you can have a good convention for.
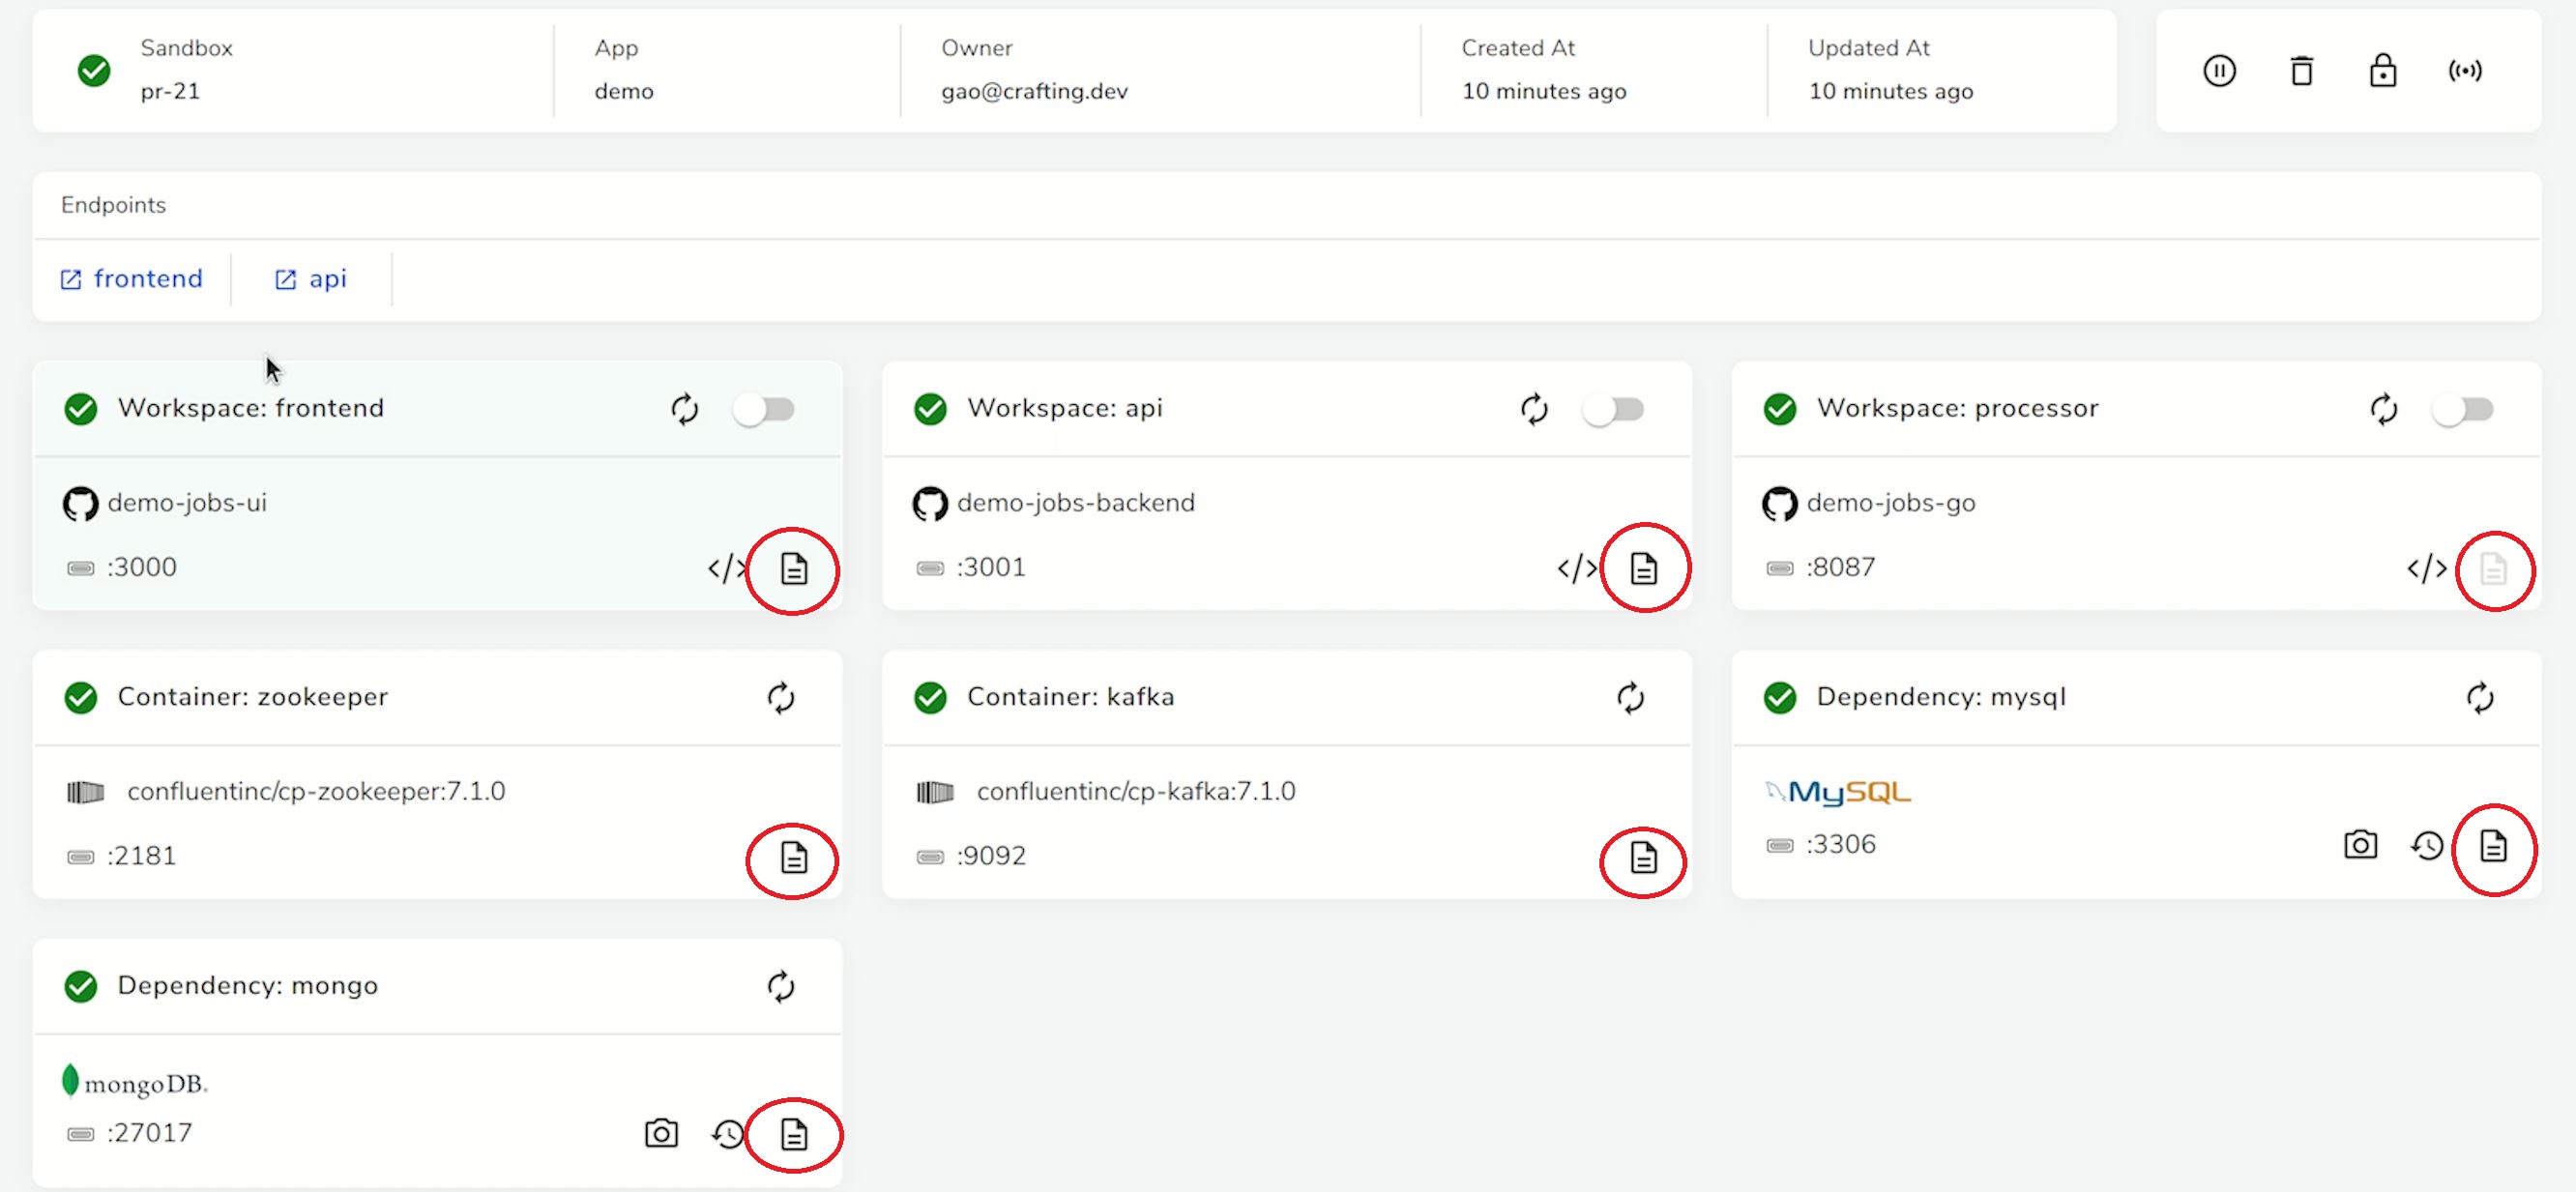
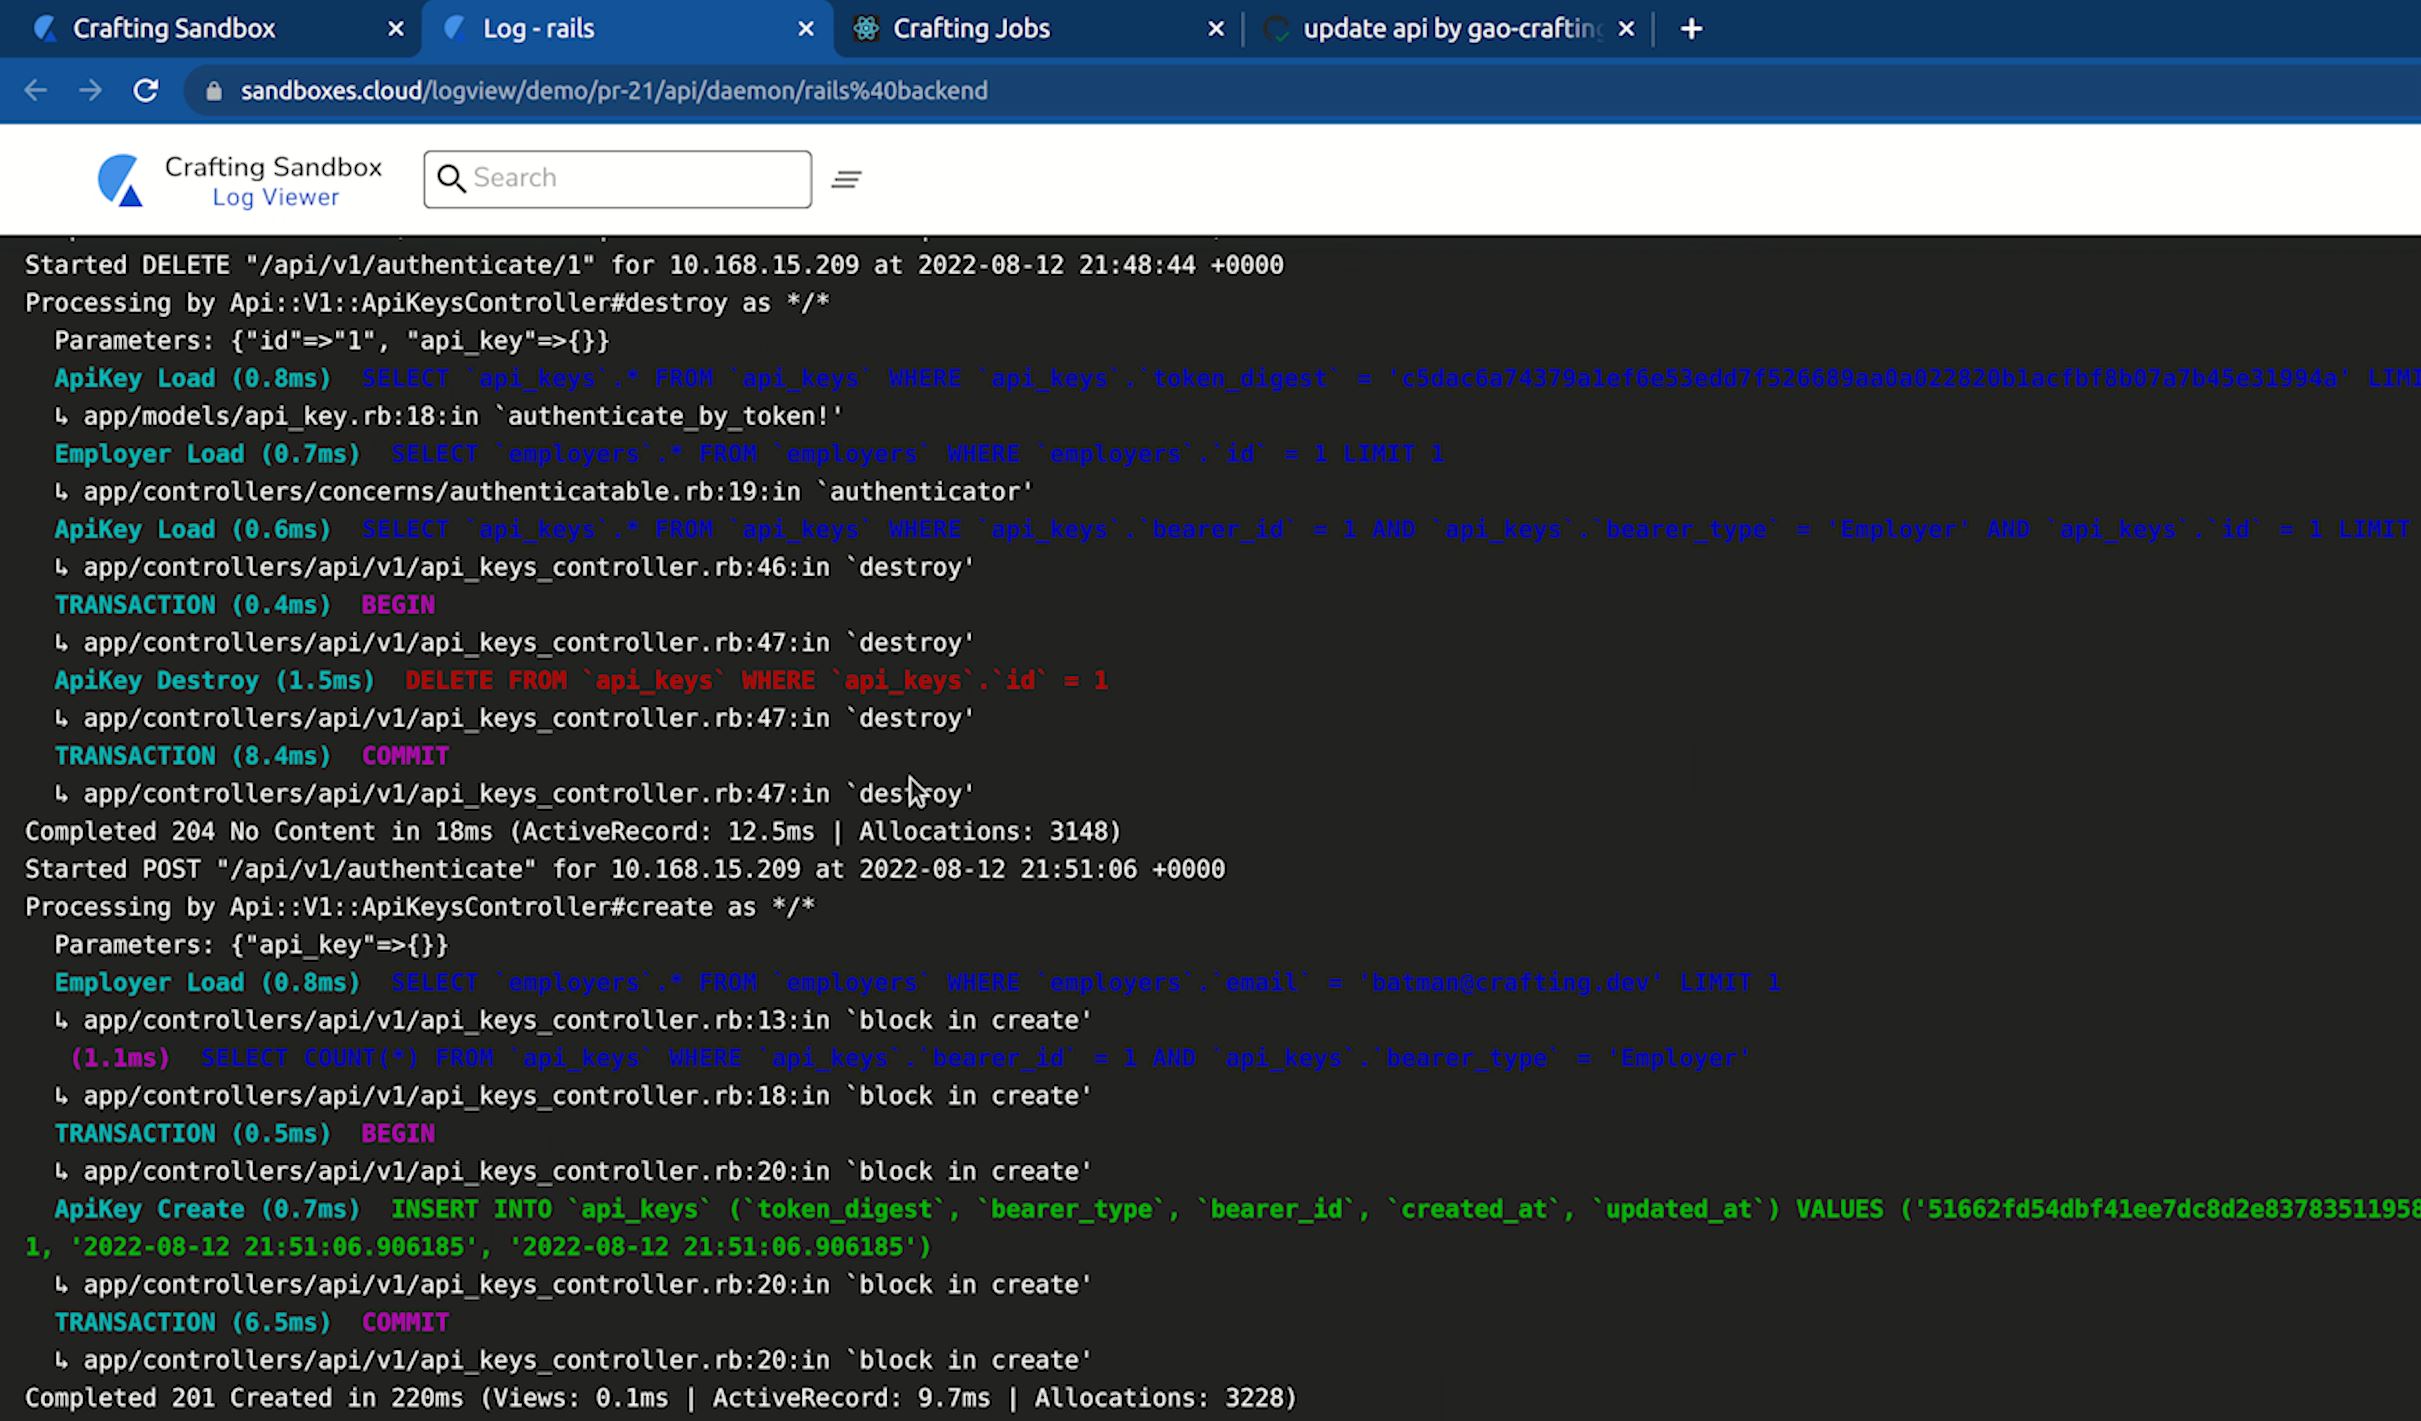
View logs, debug, and iterate
For any service running in the sandbox, you can easily inspect its log. You can choose to hop on the container to tail the log from command line, via cs log -f or use web-based log viewer directly from the sandbox view, as shown below.
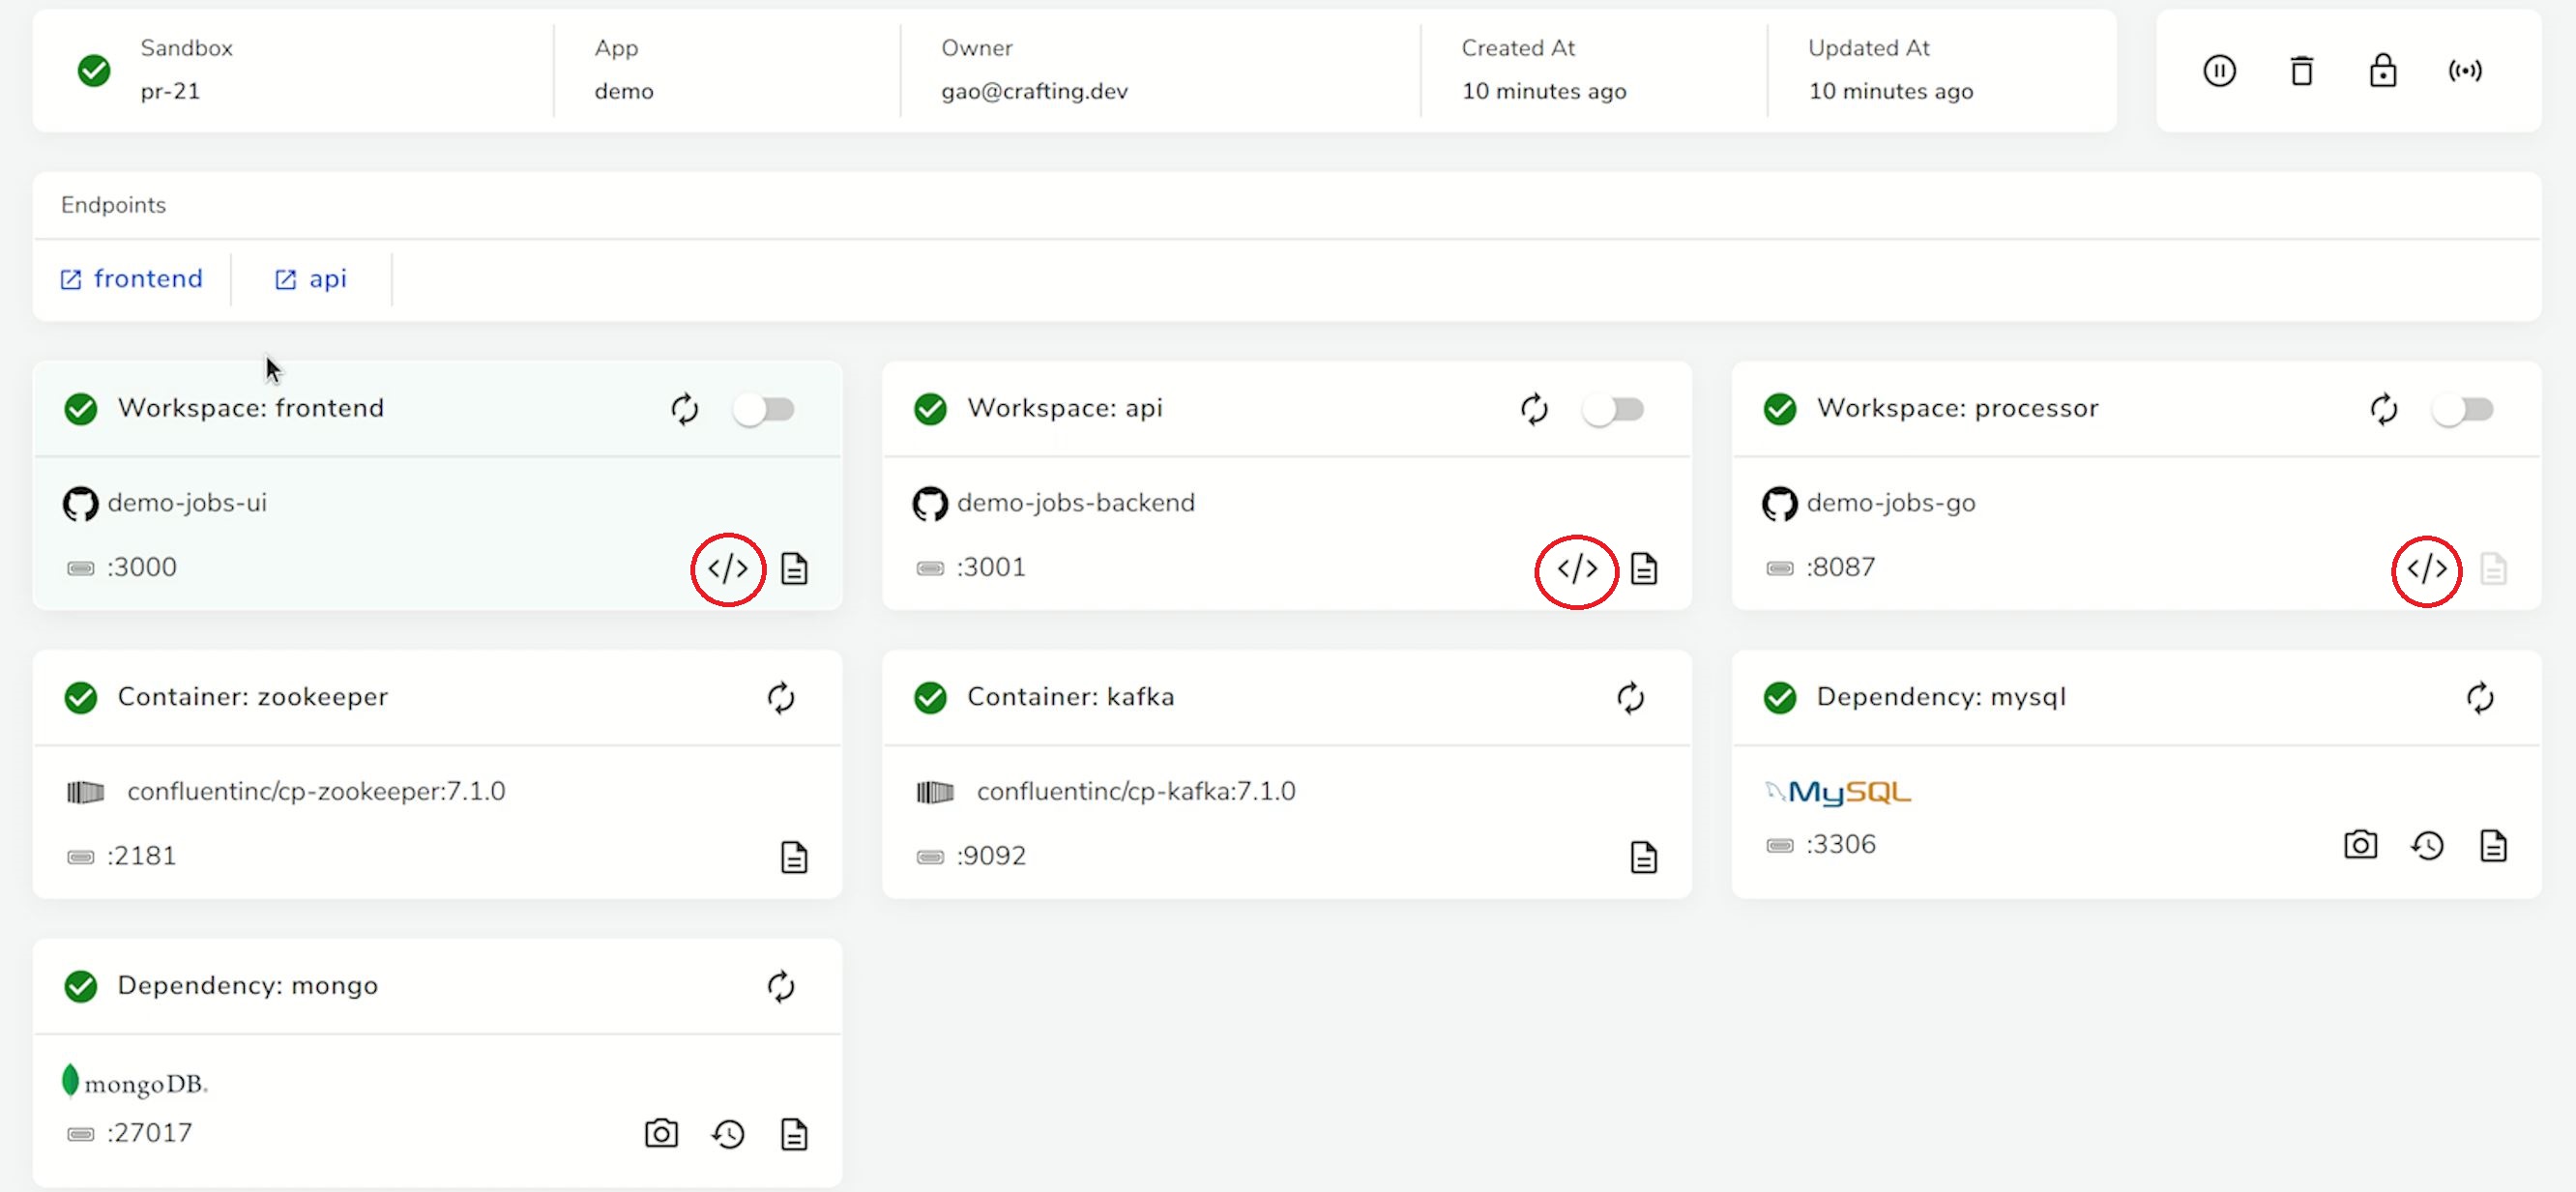
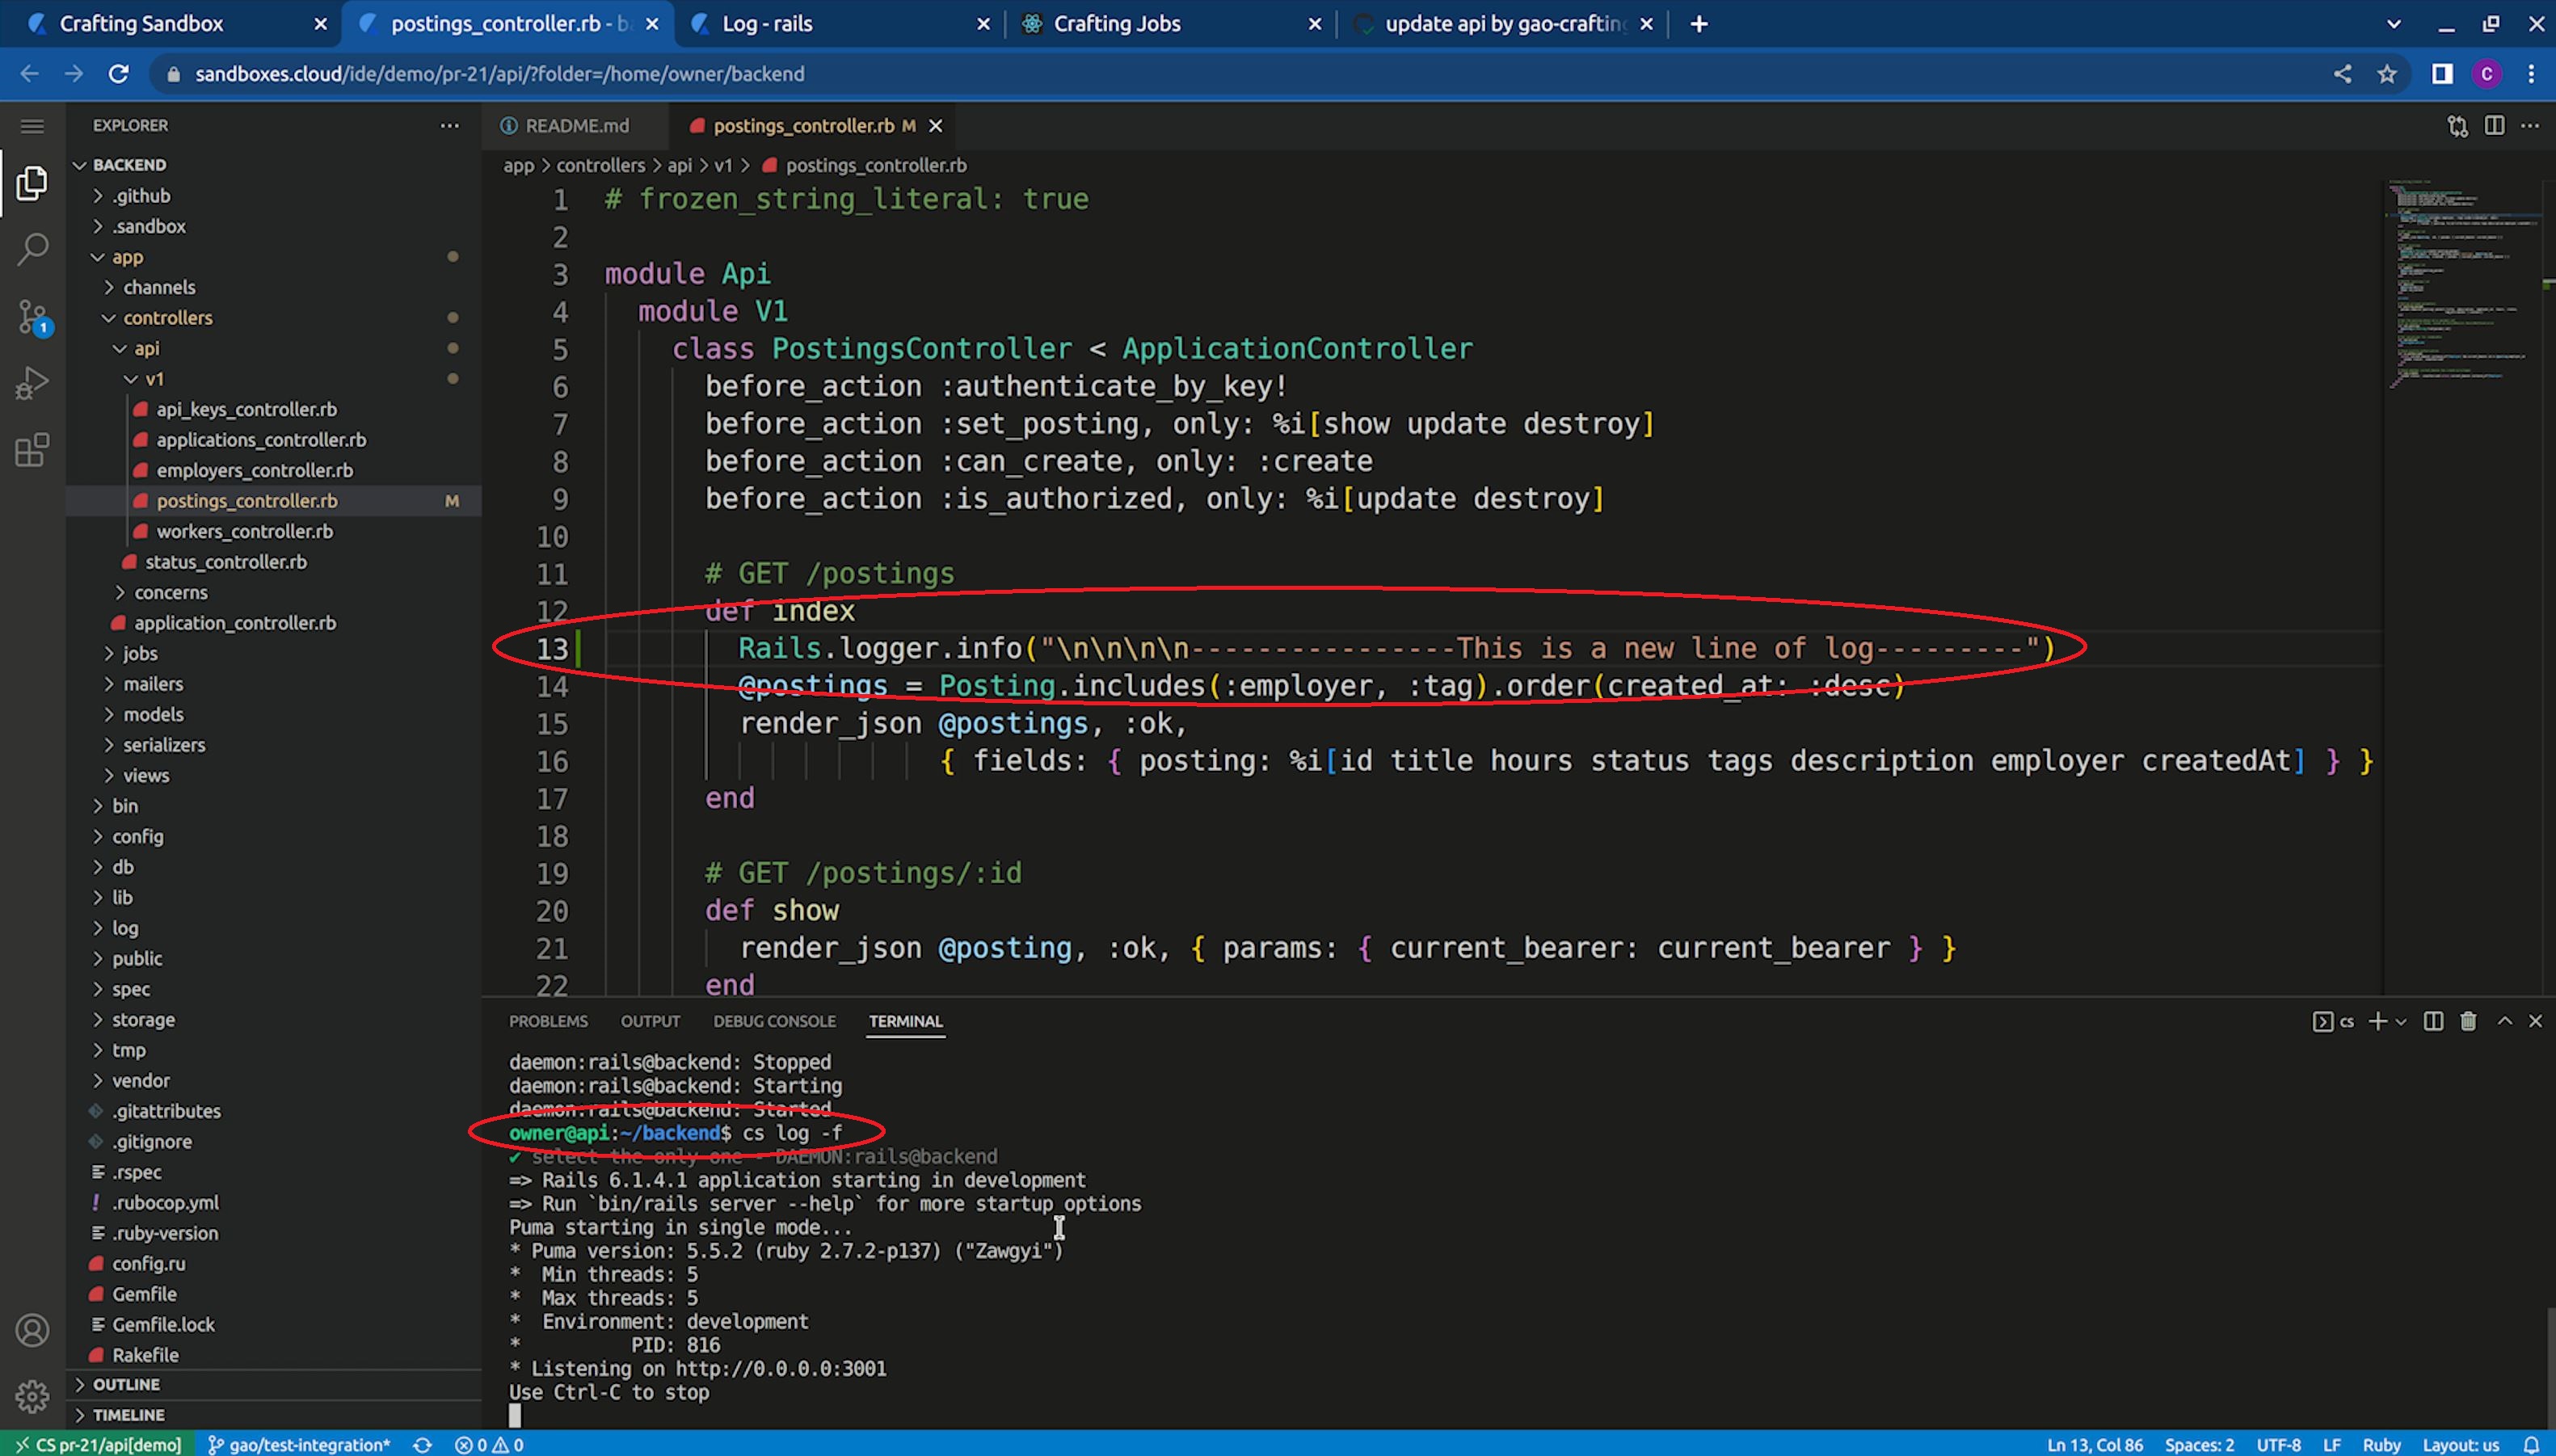
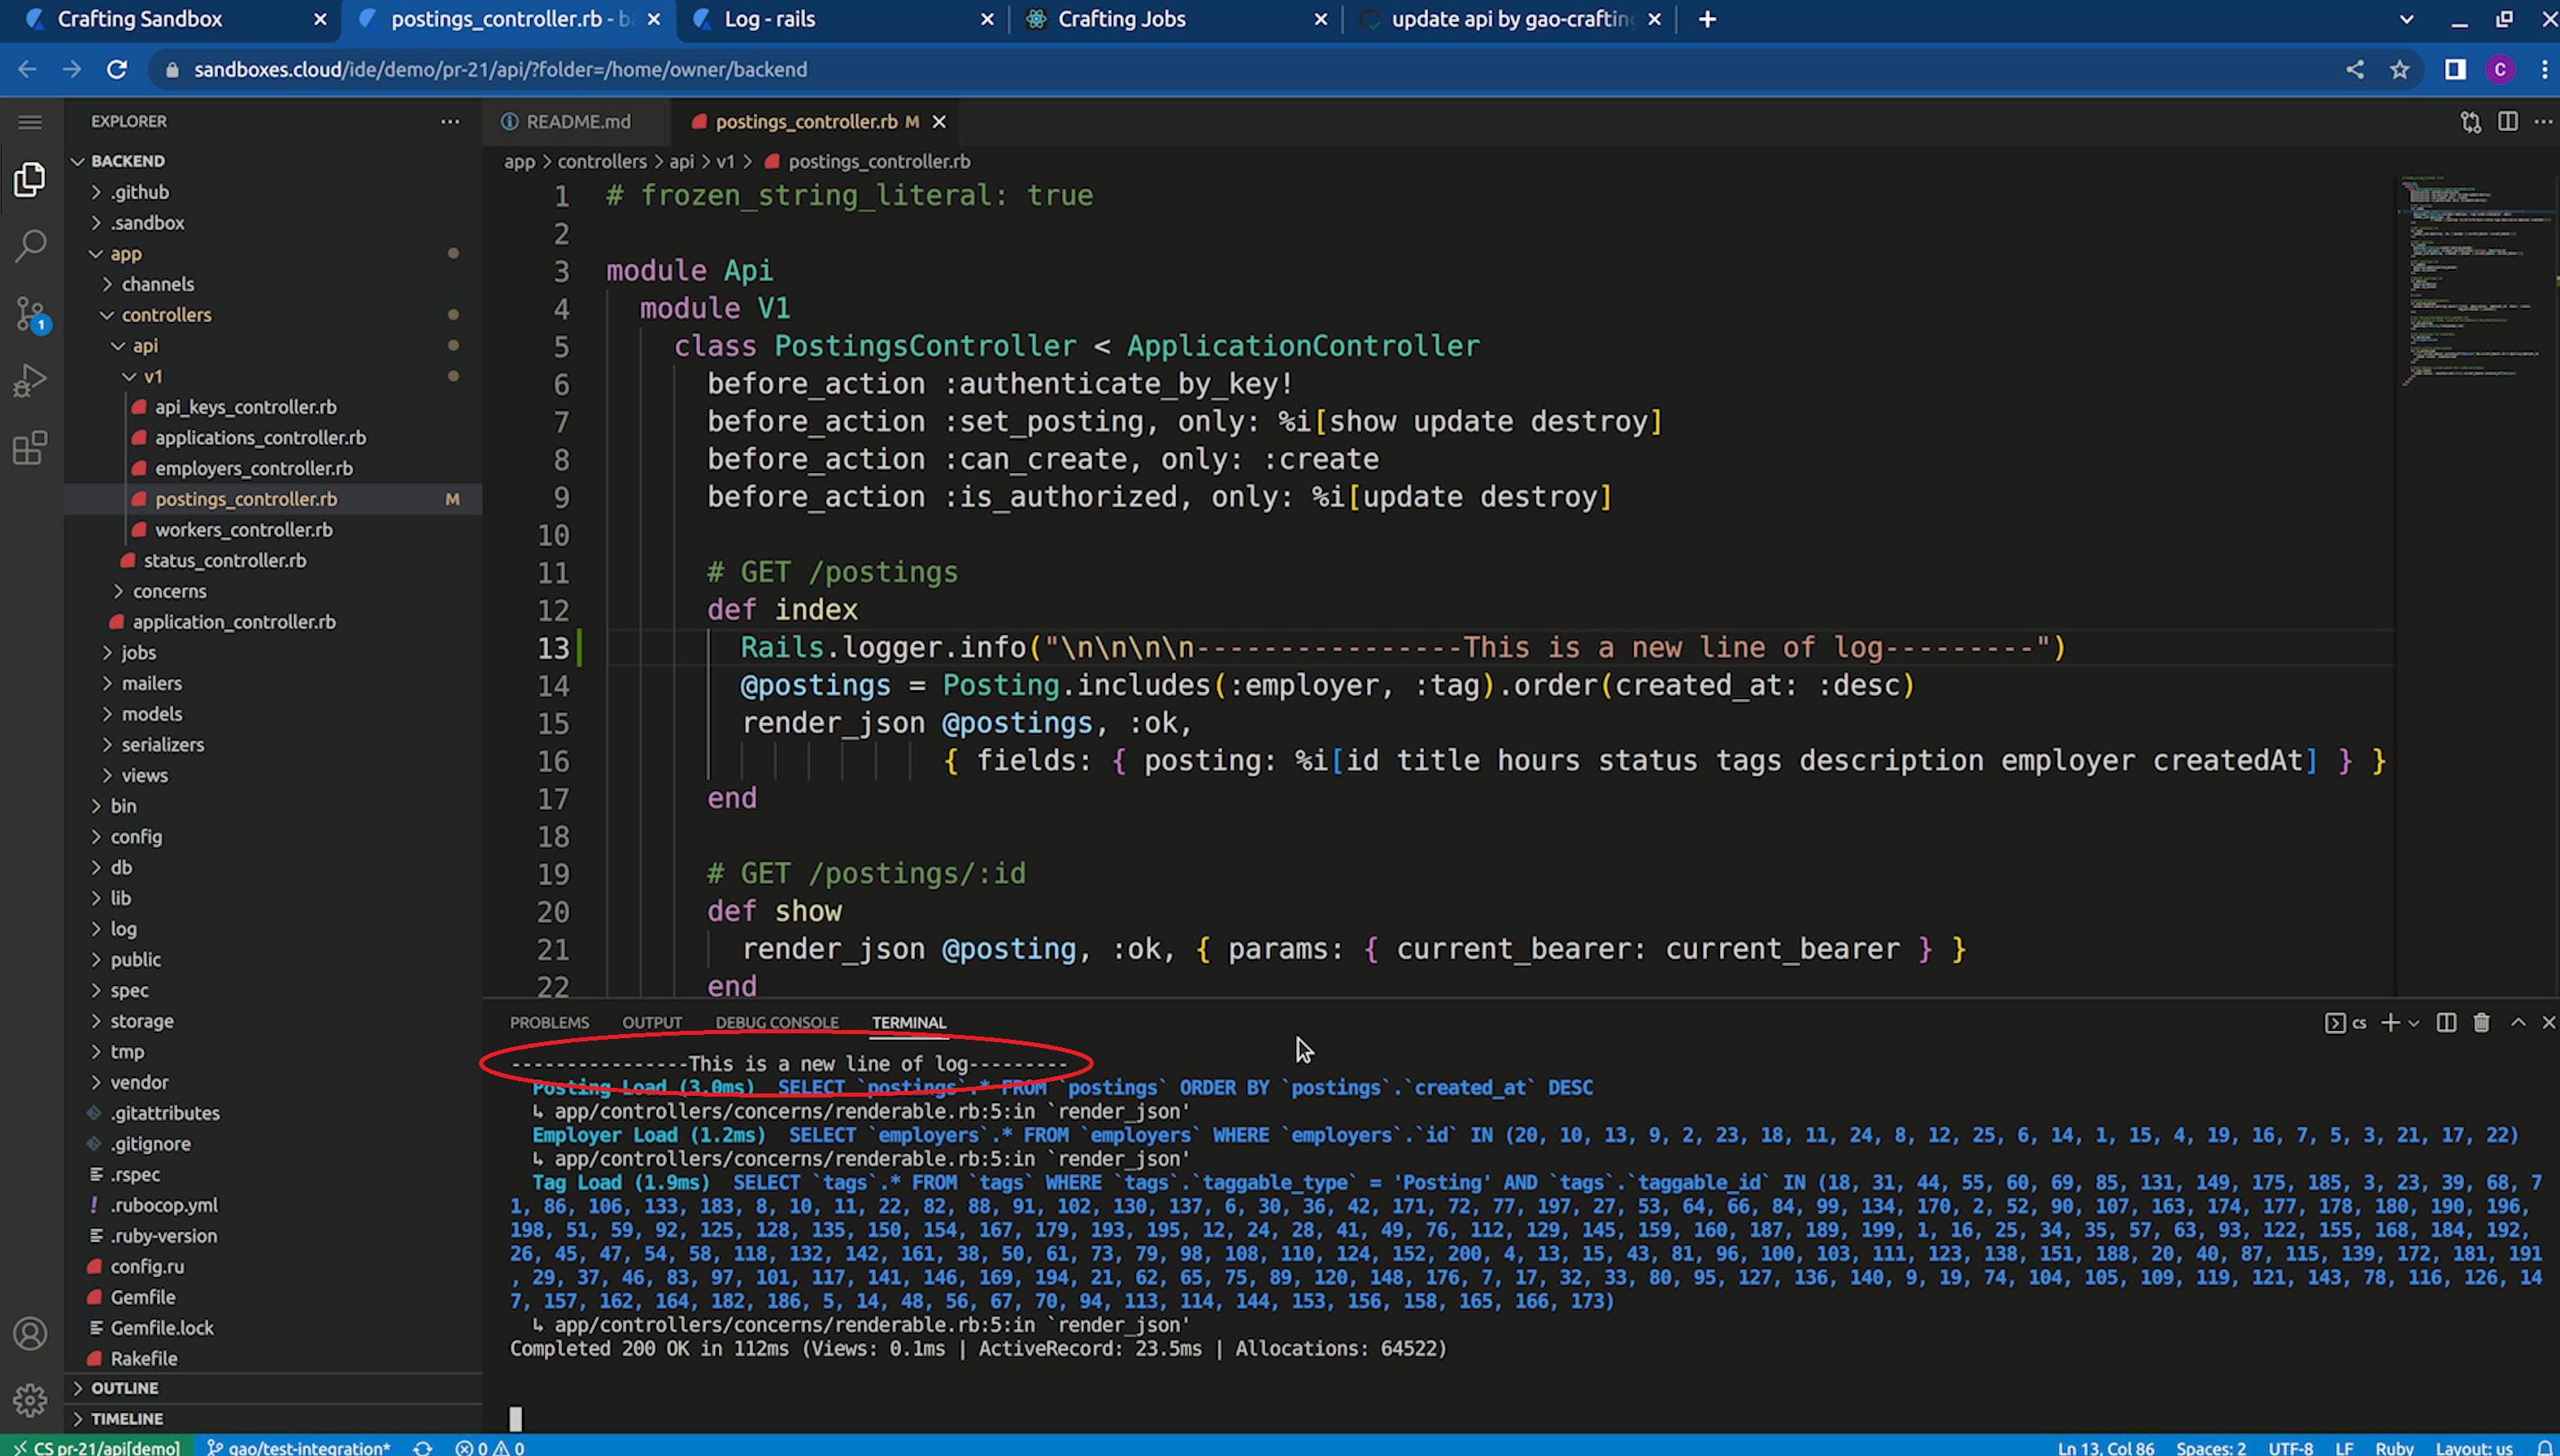
You can also add logging to your service or actually modify the code anyway you like in the sandbox. By opening Web IDE (shown below), you can access the source code and a terminal in the sandbox.
Here we can add more logging in the source code, and after restarting the process, via cs restart, we use cs log -f to tail the log from the terminal
When a request hits the sandbox again, the new logging was shown as below.
After making a code change, you can commit the code back to the git directly from the terminal in the Web IDE and push to your git repo if needed. This avoids switching environments between sandbox and your local, and allows very quick iterations to try fixes without waiting for redeployment.
Replace a service on the cloud with a local service
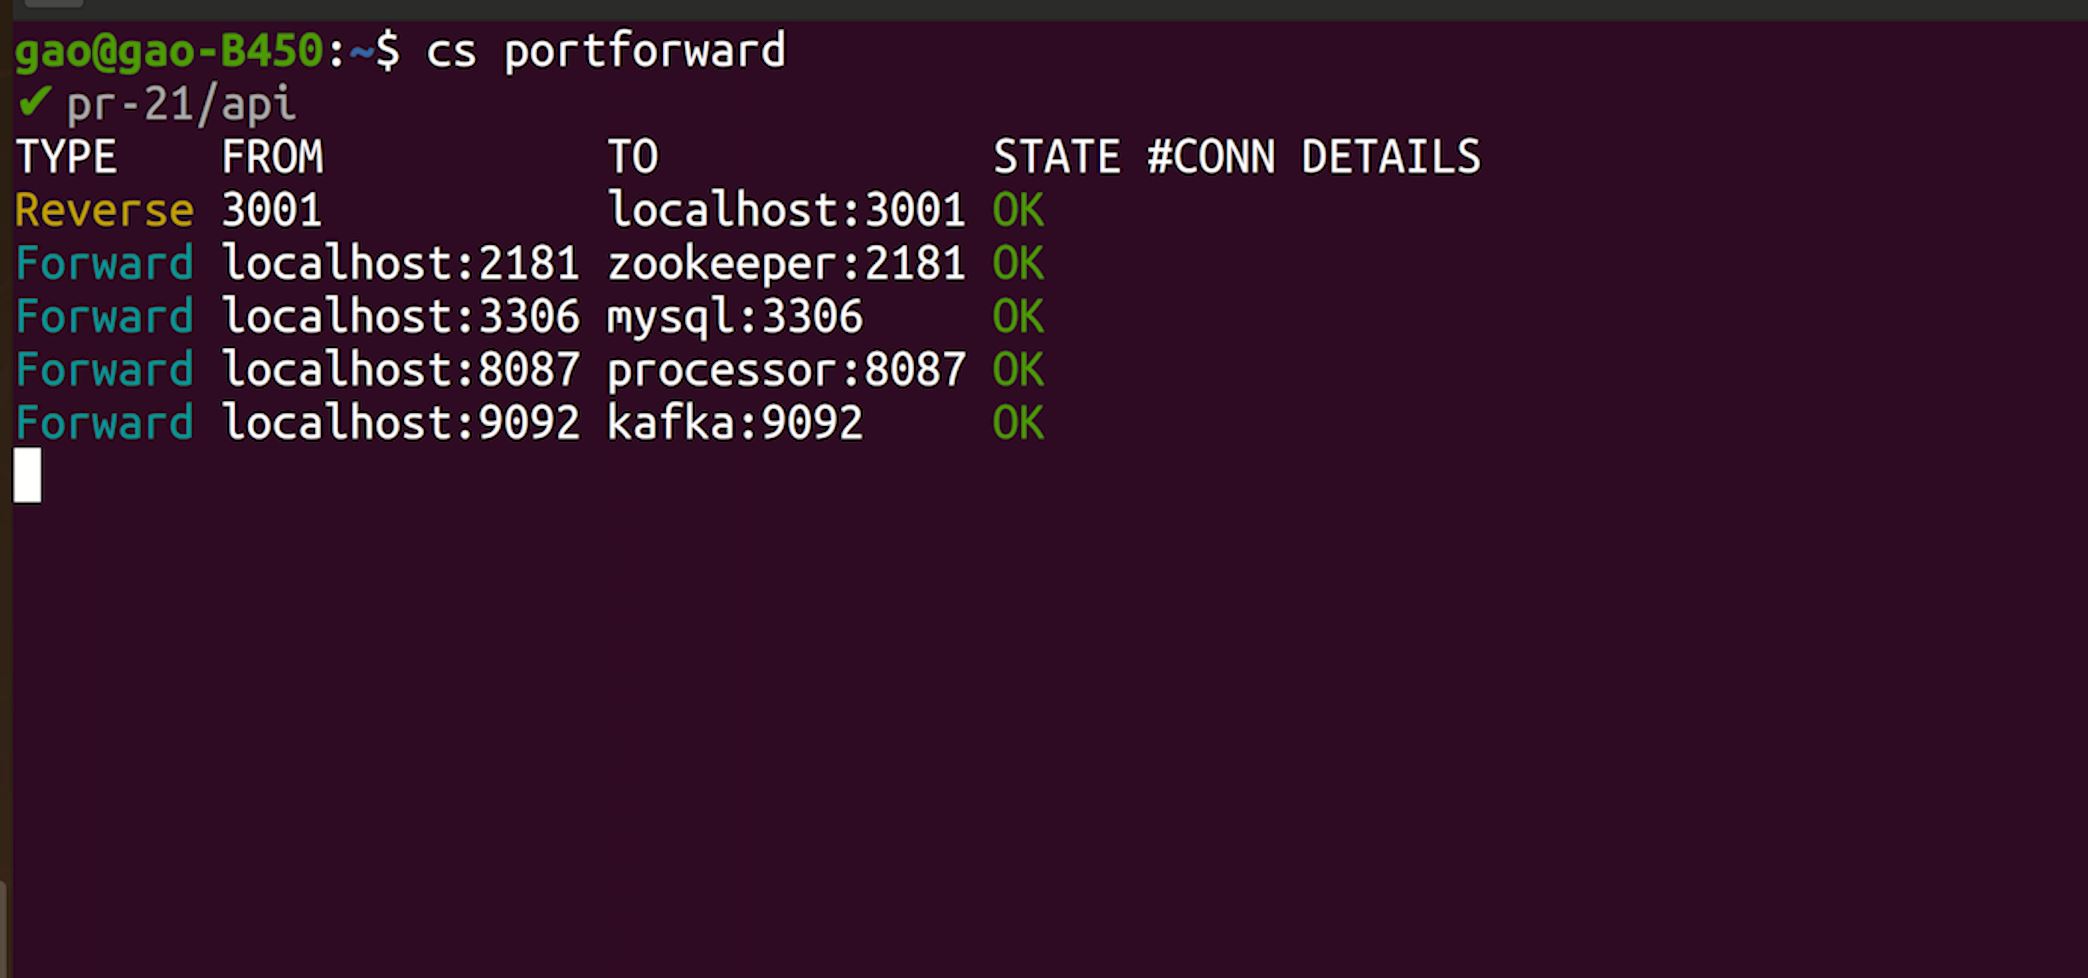
In addition to viewing logs and editing code online, you can debug even using your desktop IDE to run a local process and replace a service in the cloud and set breakpoints there. To do that, you need to first use port forwarding to connect your local with the sandbox on cloud. By running cs portfoward and selecting the service you want to replace with your local, you tell the Crafting platform to route the traffic that is supposed to hit the service in the sandbox to hit your local machine instead, and it would also handle the port forwarding in the other direction to allow your local to access other services in the sandbox via local ports.
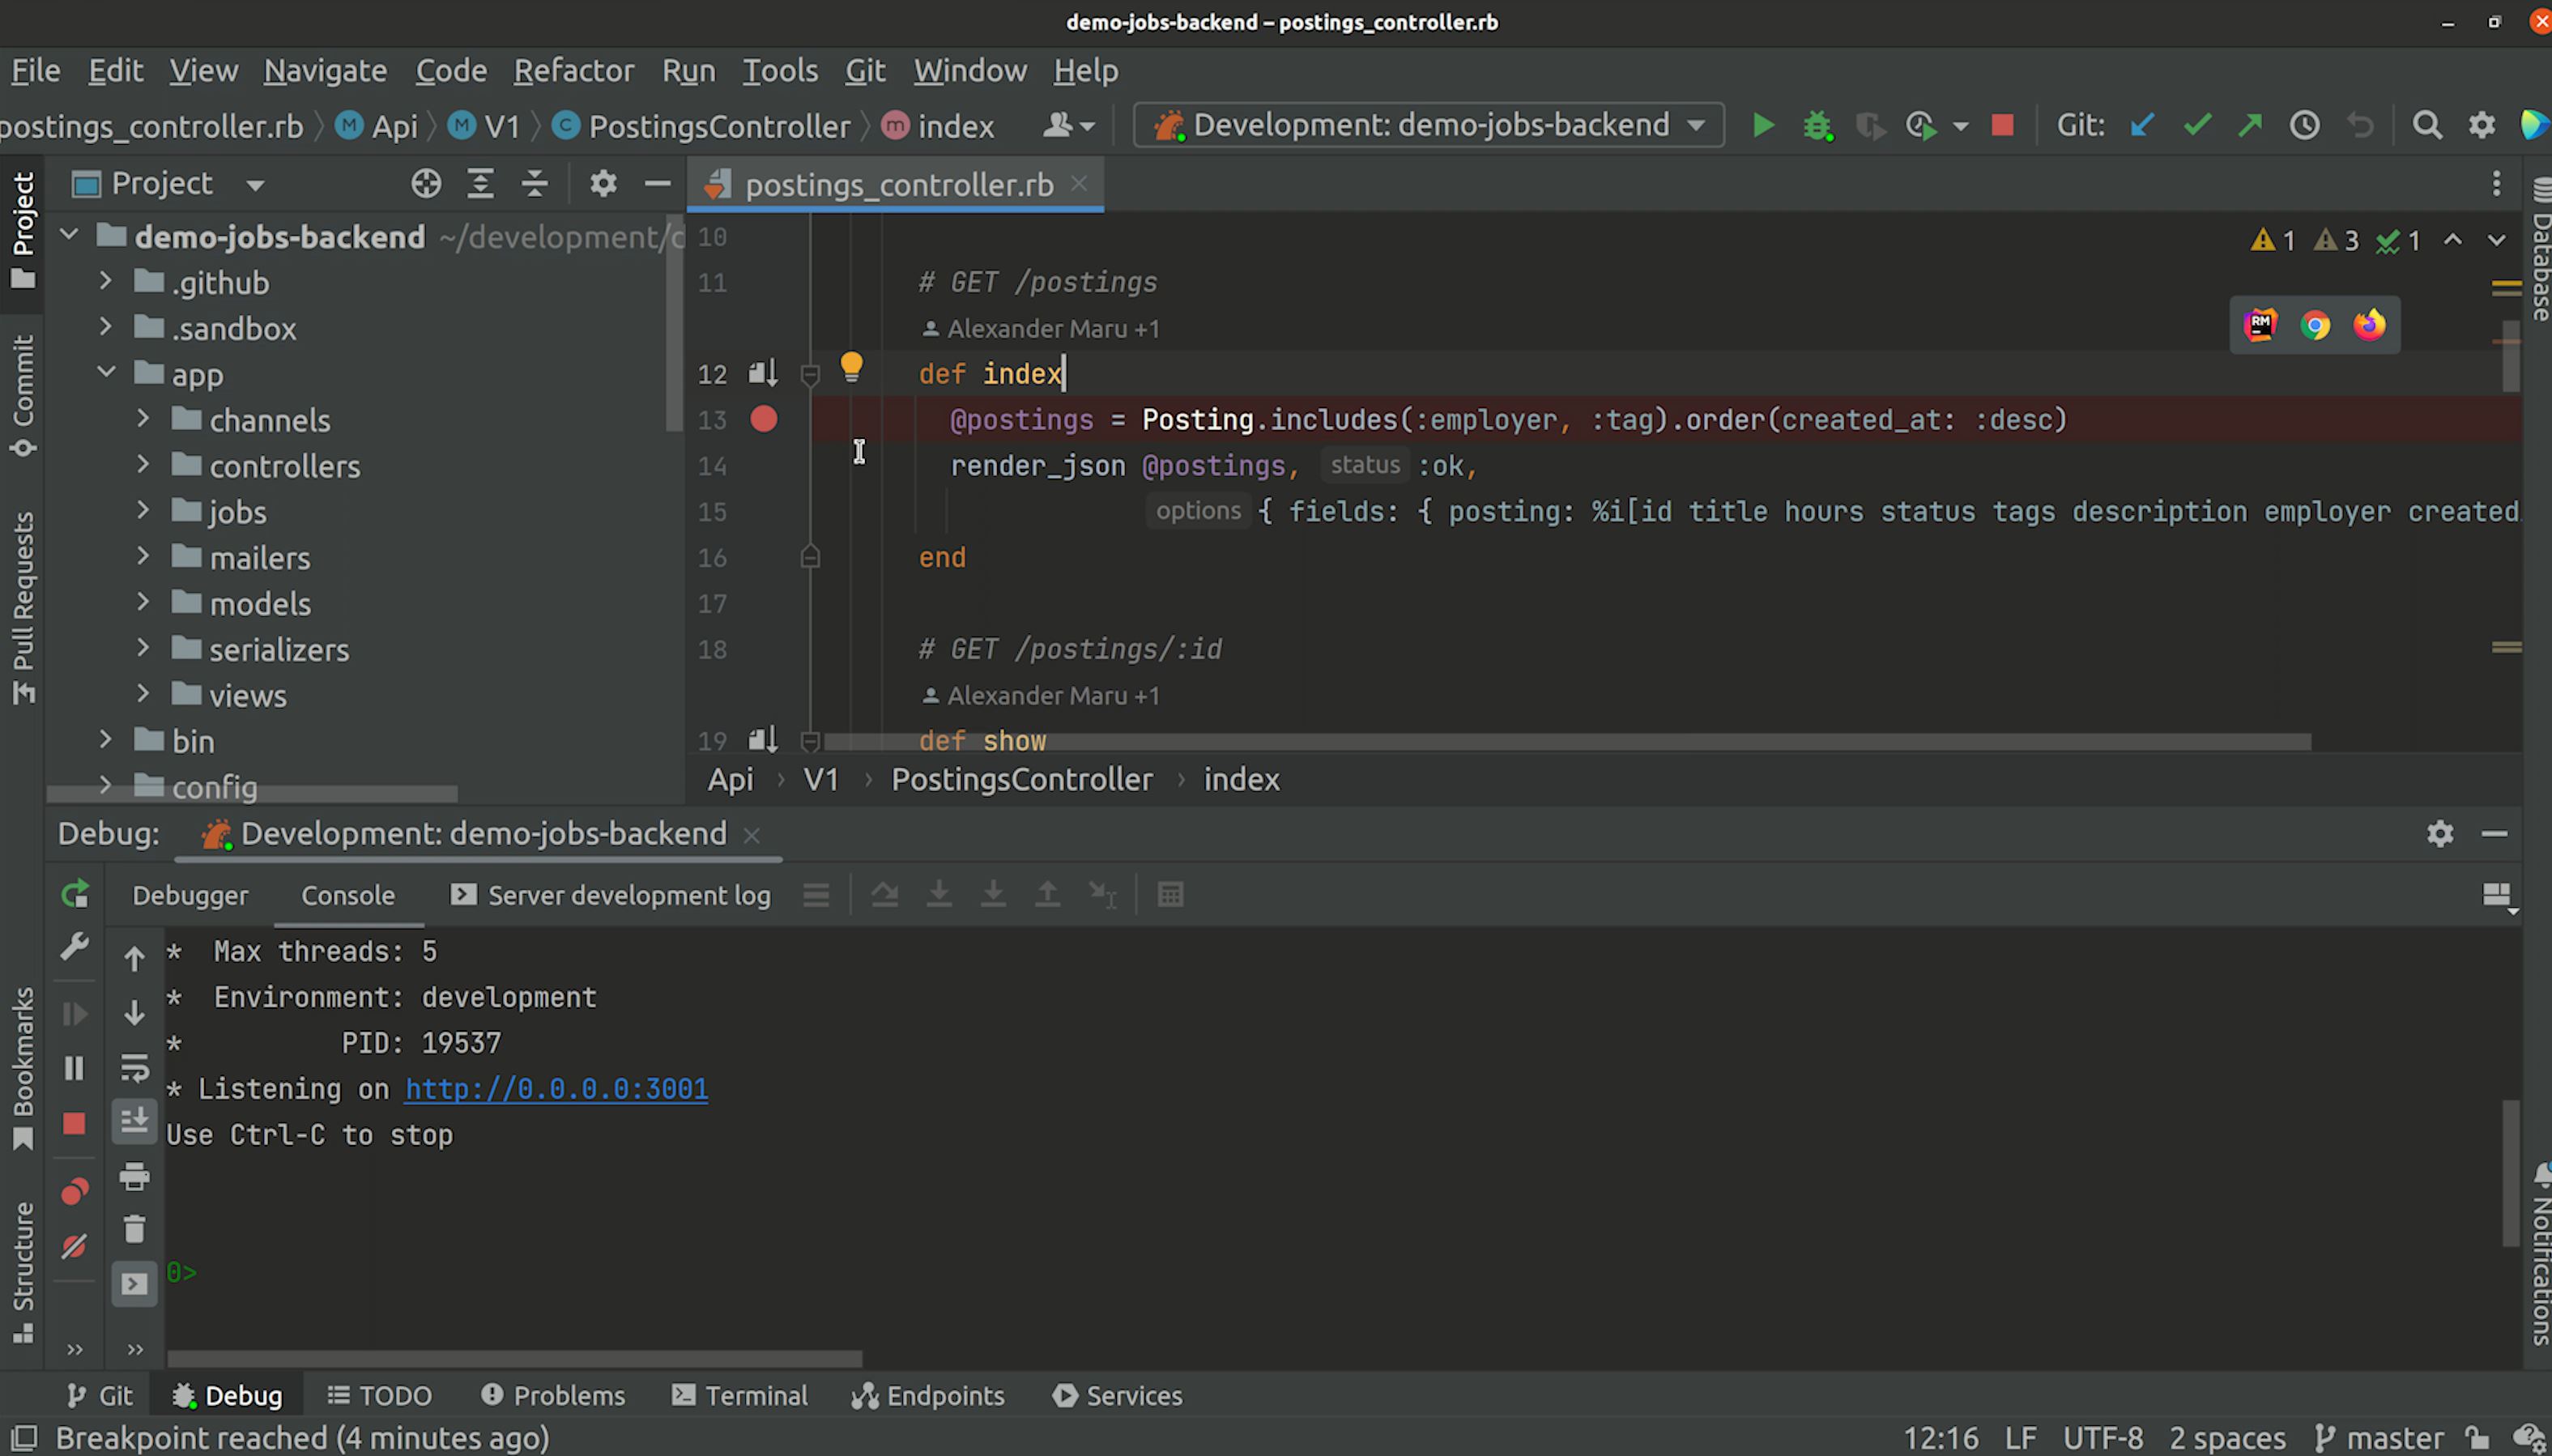
Then, you can launch your local process in debug mode from the desktop IDE with your local codebase, and set breakpoints there.
When a request hits the endpoint for the sandbox, the traffic is forward to your local port 3001, so the process running in debug mode would run that request, and hit the breakpoint you set.
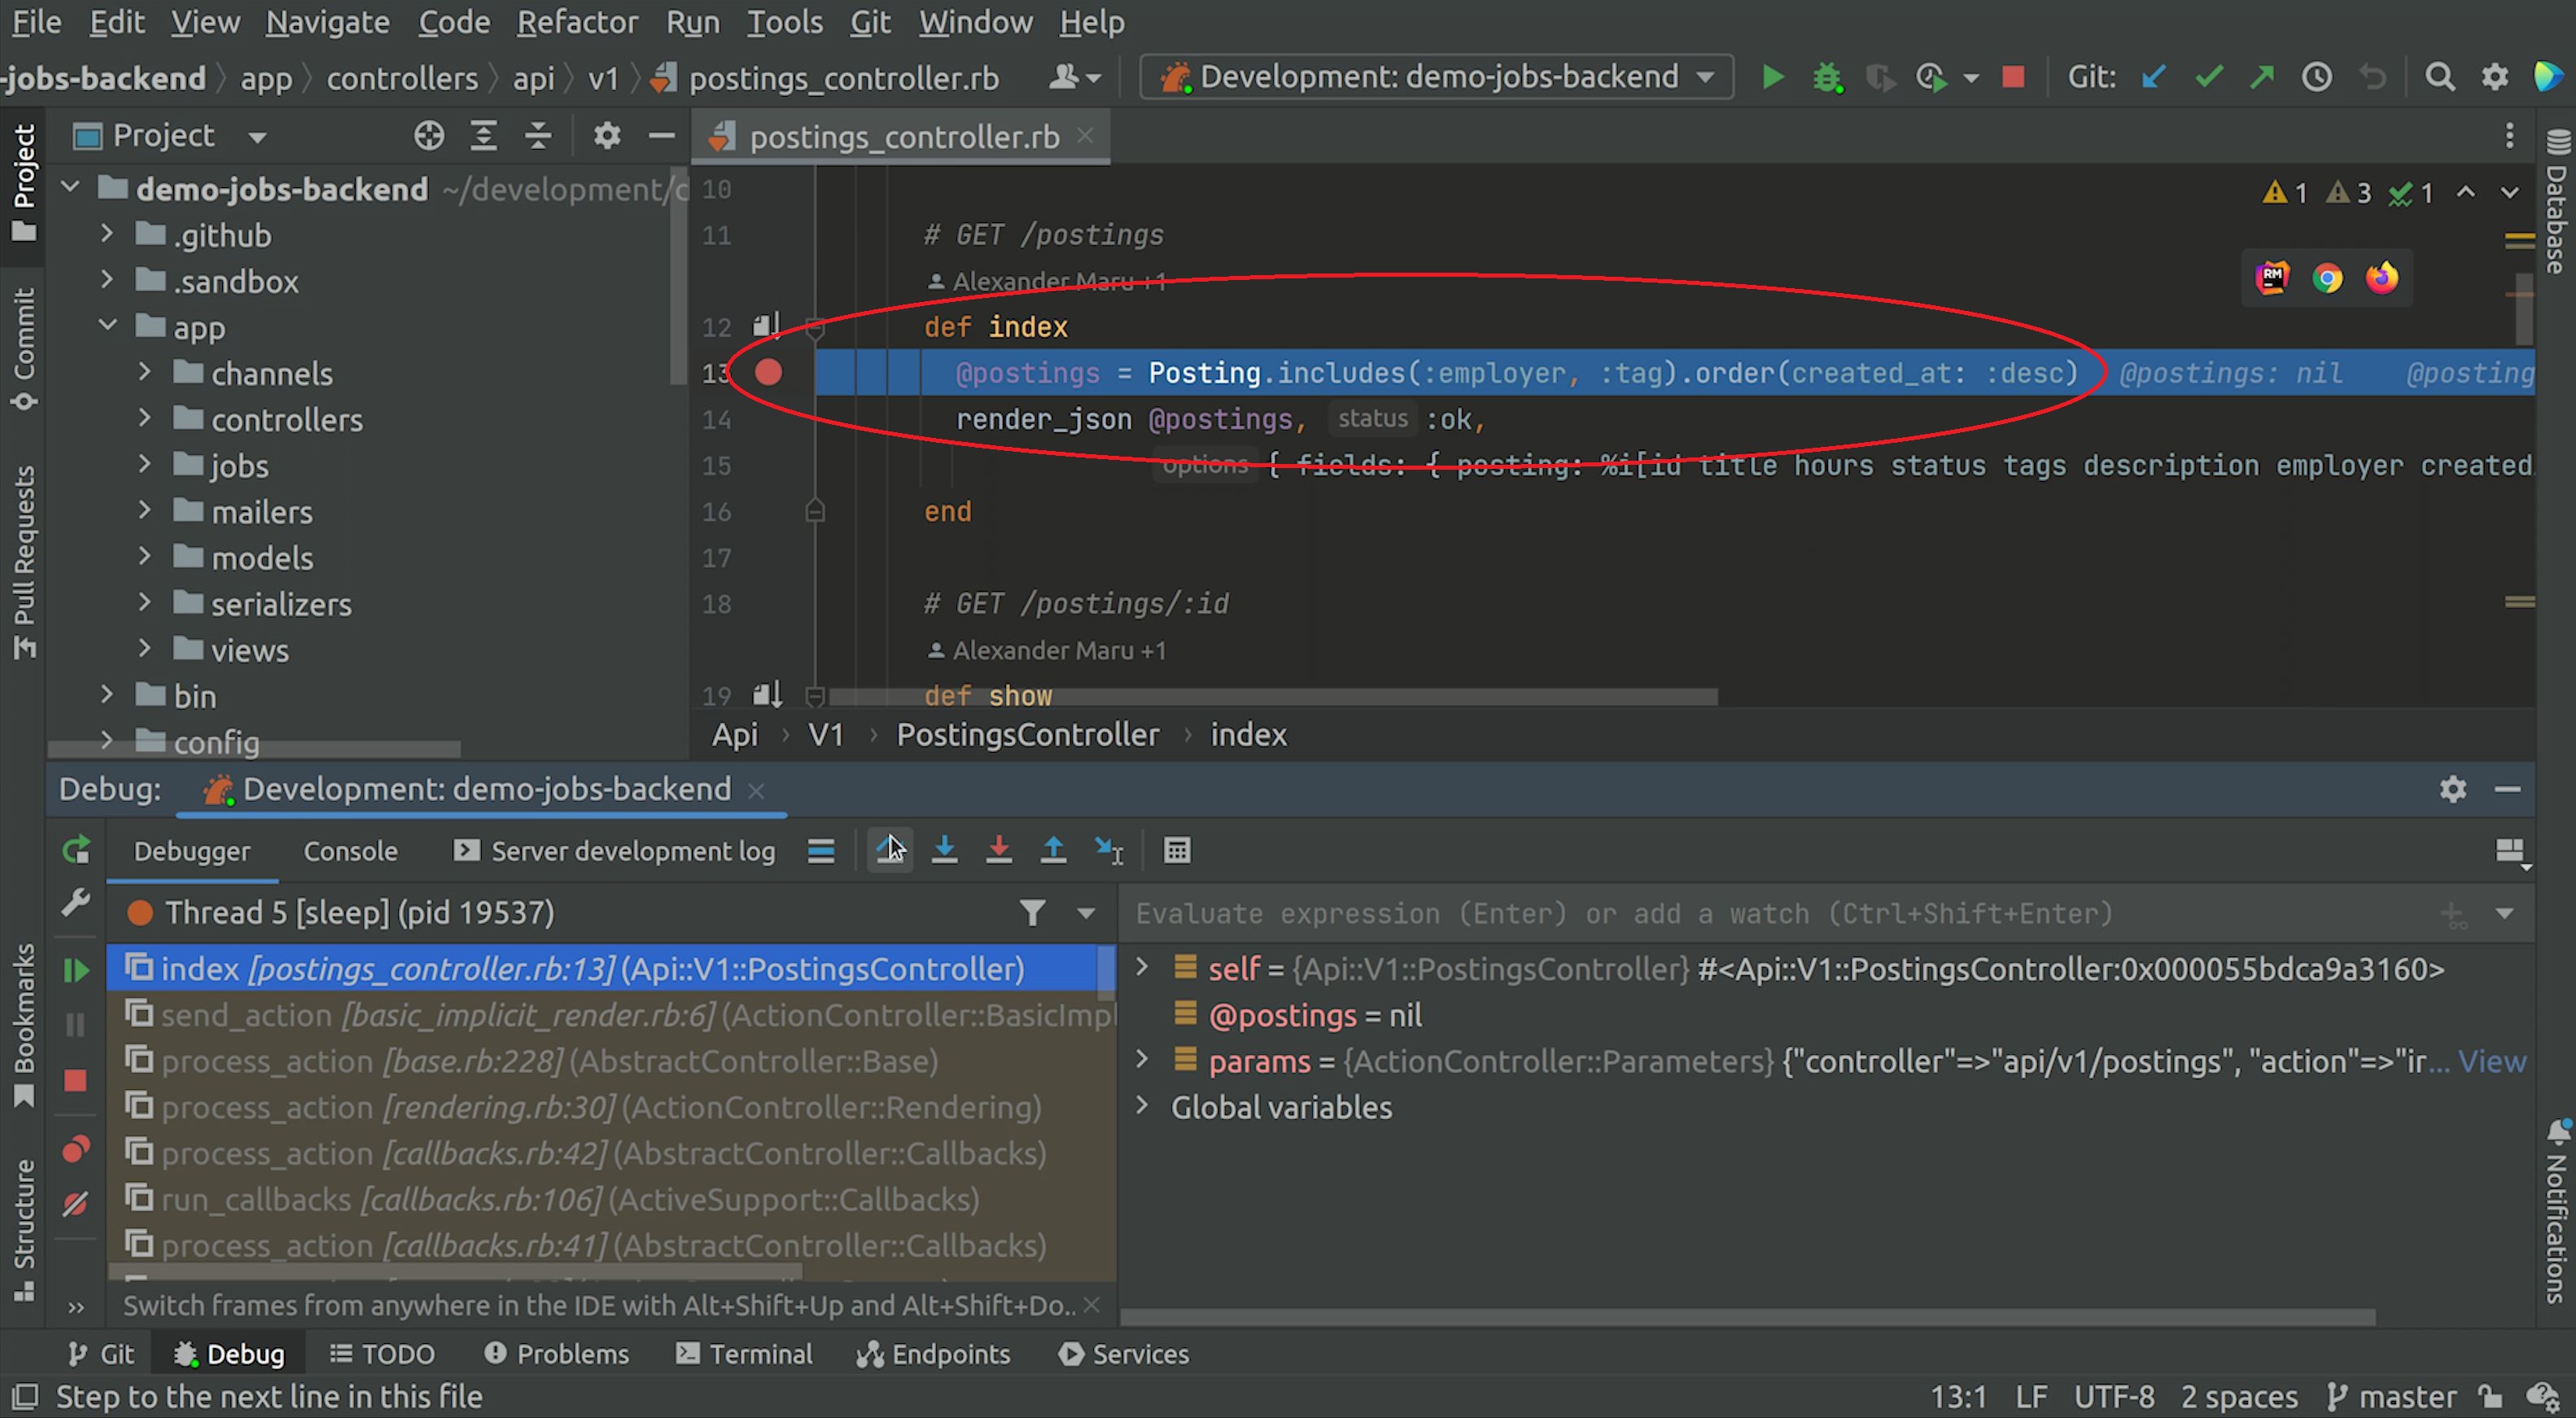
This hybrid mode allows powerful debugging technics to be applied and a great developer experience.
Setup checklist
For setting up Crafting for previewing code changes, following items are needed:
- The Crafting system (SaaS or self-hosted) and your account on Crafting
Firstly, you need to have a working system of Crafting platform that you can access via your account. There are three options: Crafting Express, Crafting SaaS, and Crafting Enterprise
- Your app on Crafting running end-to-end
Secondly, you need to set up your app on Crafting so that the Crafting platform knows how to build your app from source, and run the services in your app end-to-end for a particular version of the code in a sandbox. The required setup varies team by team and app by app. Crafting platform supports a wide range of approaches to run your app, and we can work with you to find the most fitting approach in your case. In general, the trade-offs are between two extremes.
-
Use production config, existing build pipeline, and pre-built containers as much as possible.
This will generate an environment that has high fidelity as production (or staging if you choose to use your staging config). You can set up Crafting to call your existing build pipeline and fetch built artifacts or containers from your system and run them in sandbox. You can also let Crafting reuse a pre-built production version of artifacts or containers in the services that the code doesn't change. The advantage is that the preview will be very high fidelity. The downside is that the prebuilt version may not have enough support for you to debug when things don't work. -
Run services in dev mode with source code as much as possible.
This will generate an environment that is similar to your coding environments with all the dev tools and debug capabilities you have. You can set up Crafting to checkout the code from your source repo, prepare an environment in the workspace for the code to compile and run, and launch services in dev mode. This way, Crafting doesn't need to rely on your build system and uses its own computation resources to prepare the services running in sandbox. The advantage is that the preview is highly customizable and dev-friendly, easy to tune and debug. The downside is that this may still have some gaps to the production. -
[Optional] Git repo integration
If you want to set up a Crafting link to be automatically added for each Pull Request, you need to set it up. Crafting supports auto-launch links to be created programmatically so that a sandbox with specific configs (e.g., which branch of the code to use) can be launched when the link is clicked. You can generate that link in your git automation and post it to the PR. See Git Service Integration for Preview for details
- [Optional] Kubernetes integration
If you are using Kubernetes, Crafting offers additional powerful support for Kubernetes. Please see here for more information.
- [Optional] Cloud resource integration
If you app uses serverless components such as AWS Lambda, SQS, etc., and you want to have the real cloud native resources running alongside the containers for high fidelity review. You can set up Crafting with your cloud account and create these resources on-demand and manage their lifecycles with sandbox. Please see Develop with cloud resources for more information.
Updated 8 months ago